「簡単なタイミングゲーム」をUnityで作成してみます。ゲーム作成というよりは、作成メモみたいな感じです。
はじめに
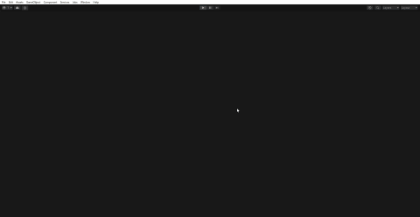
今回作成するのは下記のようにバーが動いて、指定した範囲内(赤色)でキーを押したら成功、範囲外なら失敗という感じのものです。形は違えどミニゲーム的な感じで実装されているのは良くみますね。
Unityのバージョン
「Unity 2022.3.14f1」バージョン、テンプレートは「2D」を選択しています。
作成開始
簡単にUIを作成してからスクリプトで実装していきます。
簡単なUI作成
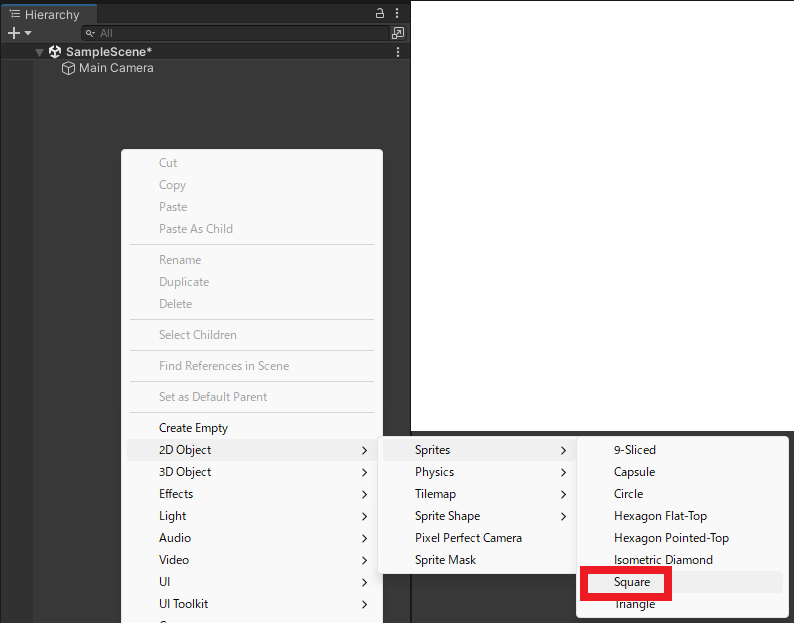
Hierarchyで右クリック、「2DObject」→「Sprites」→「Square」を追加。
名前を「Meter」にして、配下に同じようにSquareを追加。名前を「HitZone」にします。
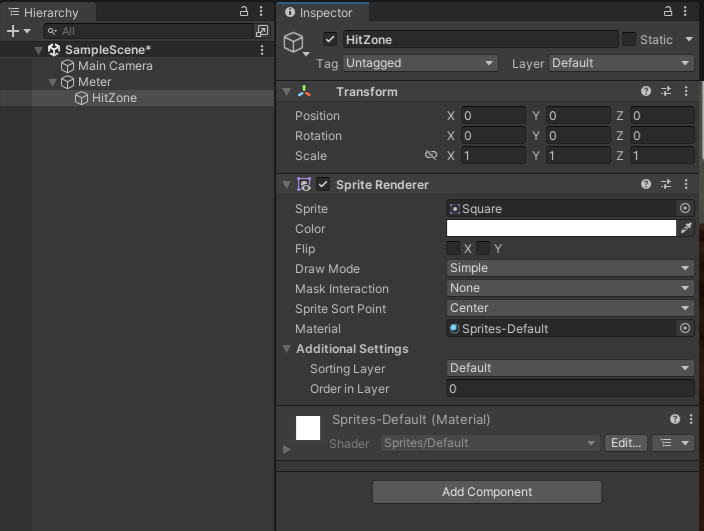
MeterとHitZoneのScaleとColorを下記のような感じに変更。

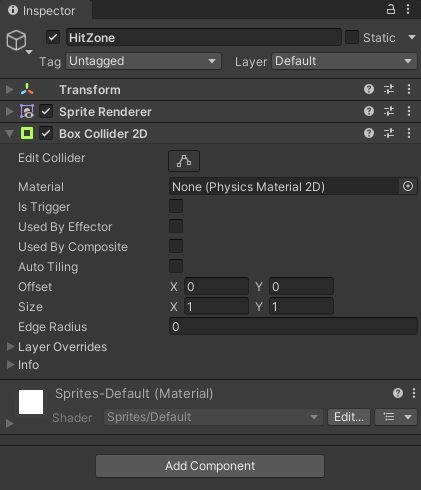
HitZoneにはBoxCollider2Dをアタッチします。
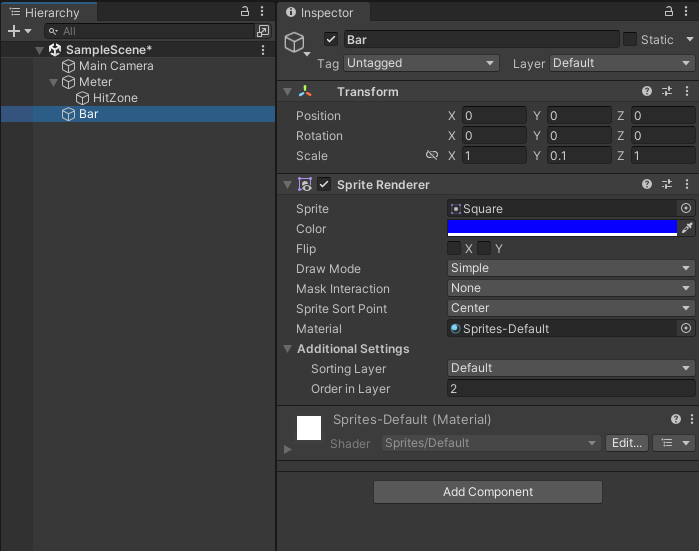
同じく、Squareを追加して名前を「Bar」にして、ScaleとColorを変更します。
下記のような感じに簡単なUIを作成します。

スクリプトの作成
下記スクリプトを作成、Barオブジェクトにアタッチします。バーを上下に動かし指定した位置を往復するスクリプトです。
using UnityEngine;

public class bar : MonoBehaviour
{

    private float MoveSpeed = 2.0f;
    private int direction = 1;

    void FixedUpdate()
    {
        if (transform.position.y >= 2.45)
            direction = -1;
        if (transform.position.y <= -2.45)
            direction = 1;

        transform.position = new Vector3(0,
            transform.position.y + MoveSpeed * Time.fixedDeltaTime * direction, 0);
    }
}
次に、Update部分を追加。スペースキーを押した時に赤色内にバーがあればHitとし、それ以外はMissとします。
using UnityEngine;

public class bar : MonoBehaviour
{

    private float MoveSpeed = 2.0f;
    private int direction = 1;

    void FixedUpdate()
    {
        if (transform.position.y >= 2.45)
            direction = -1;
        if (transform.position.y <= -2.45)
            direction = 1;
        transform.position = new Vector3(0,
            transform.position.y + MoveSpeed * Time.fixedDeltaTime * direction, 0);
    }

    private void Update()
    {
        if (Input.GetKeyUp(KeyCode.Space))
        {
            if (transform.position.y >= -0.7 && transform.position.y <= 0.7)
            {
                Debug.Log("Hit");
            }
            else
            {
                Debug.Log("Miss");
            }
        }
    }
}
実行すると下記のような感じに。実際には「2.45」や「0.7」という部分はオブジェクトのサイズなどから算出するのが良いかな。

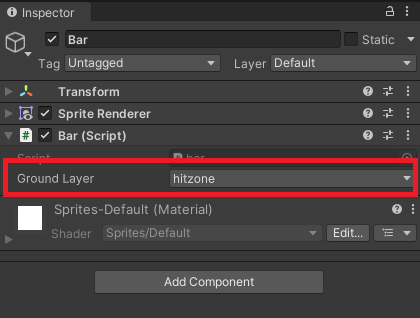
「Physics2D.OverlapBox」を使った方法の場合、Update内を下記に変更します。FixedUpdateは変更ないので省略
。
using UnityEngine;

public class bar : MonoBehaviour
{

    [SerializeField] private LayerMask groundLayer;

    private float MoveSpeed = 2.0f;
    private int direction = 1;
    private bool isCheck;

    private void Update()
    {
        Collider2D hit = Physics2D.OverlapBox(transform.position,
            transform.localScale / 2.0f, 0f, groundLayer);

        if (hit)
            isCheck = true;
        else
            isCheck = false;

        if (Input.GetKeyUp(KeyCode.Space))
        {
            if (isCheck)
            {
                Debug.Log("Hit");
            }
            else
            {
                Debug.Log("Miss");
            }
        }
    }
}
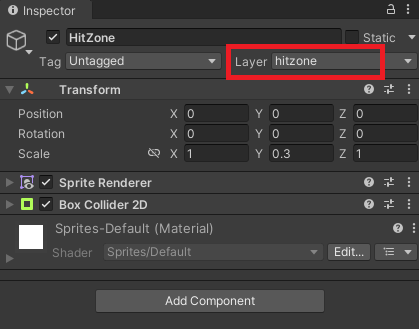
HitZoneのLayerを設定。パラメータをセットすると、同じように動作します。