「簡単なパックマン風のゲーム」をUnityで作成してみます。
完全なパックマンを作るのではなく、チュートリアルのような感じで、初めてUnityでゲームを作る人でも出来るミニゲーム的な内容です。
はじめに
今回作成するのは「プレイヤーが決められた範囲内を動く」、「敵をよけて、落ちているアイテムを回収」するものです。簡単に言うとパックマン的なゲームです。
練習的なミニゲームを想定して作成していくので、音や開始画面、クリア画面、オプションなどは作成予定無しです。基本的なゲーム部分を作成していきます。
Unityのバージョン
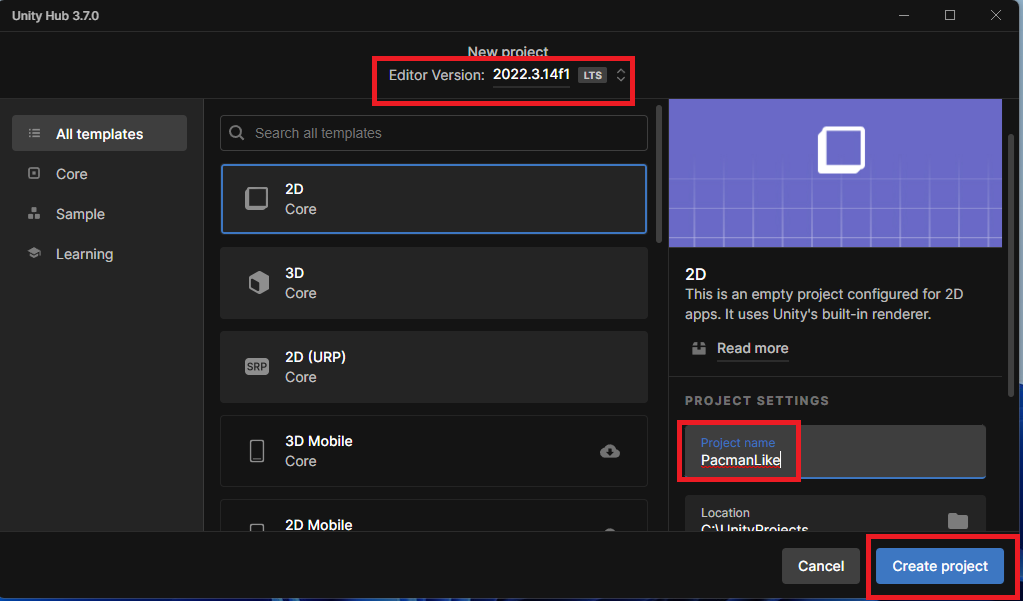
今回は「Unity 2022.3.14f1」バージョンで作成していきます。OSはWindows11です。
UnityHubを起動したら「新しいプロジェクト」を選択。テンプレートは「2D」を選択して、プロジェクト名は「PacmanLike」としています。
作成開始
Part1ではプレイヤーを作成していきます。
プレイヤーの作成
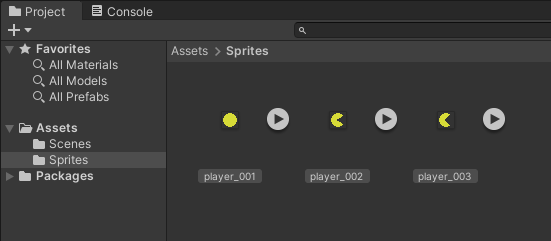
プレイヤーとして下記の画像を利用していきます。

画像を3枚(16×16のサイズ)に分割。Assetsフォルダ内にSpritesフォルダを作成して、Unityに取り込みます(Unity側で画像を分割してもOK)。
Unityで画像を分割する方法は下記が参考になります。

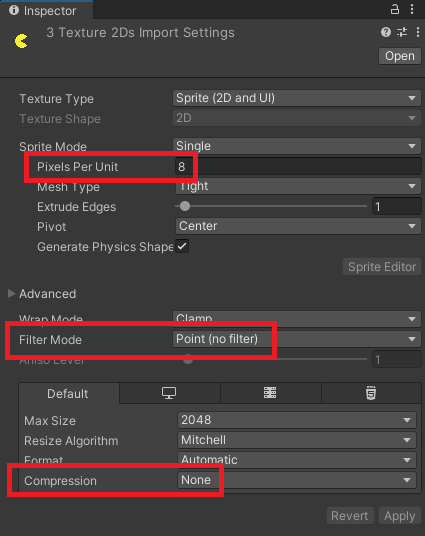
画像を3つとも選択して、Inspector画面で下記のようにドット絵の設定をします。
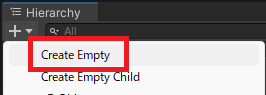
「Hierarchy」で「CreateEmpty」を選択し空オブジェクトを追加します。
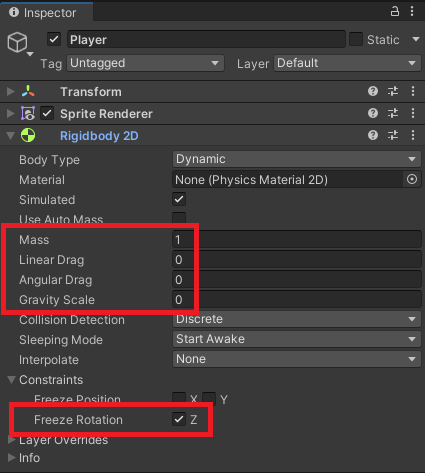
名前をPlayerにして、「SpriteRenderer」をアタッチ。Spriteにプレイヤーの画像をセットします。

「Rigidbody2D」もアタッチして、重力で下に落ちないように設定します。
プレイヤースクリプトの作成
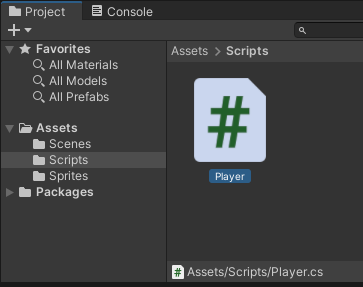
Assetsフォルダ内にScriptsフォルダを作成、その中にPlayerスクリプトを作成します。
Plyaerスクリプトの中身は下記に変更します。キーボードの上下左右、WASDを入力すると、入力した方向にプレイヤーが動きます。direction変数に方向を保持することで、次の入力があるまで同じ方向に動き続けます。
using UnityEngine;

public class Player : MonoBehaviour
{
    private Rigidbody2D rb;
    private float speed = 8.0f;
    private Vector2 direction;

    private void Start()
    {
        rb = GetComponent<Rigidbody2D>();
    }

    private void Update()
    {
        if (Input.GetAxisRaw("Horizontal") != 0|| Input.GetAxisRaw("Vertical") != 0)
        {
            direction.x = Input.GetAxisRaw("Horizontal");
            direction.y = Input.GetAxisRaw("Vertical");
        }
    }

    private void FixedUpdate()
    {
        Vector2 dist = direction * speed * Time.fixedDeltaTime;
        rb.MovePosition(rb.position + dist);
    }
}
実行してキー入力すると下記のような感じに動きます。「→」を一度押すと、右に進み続けます。
アニメーションの追加
次にプレイヤーにアニメーションを加えていきます。
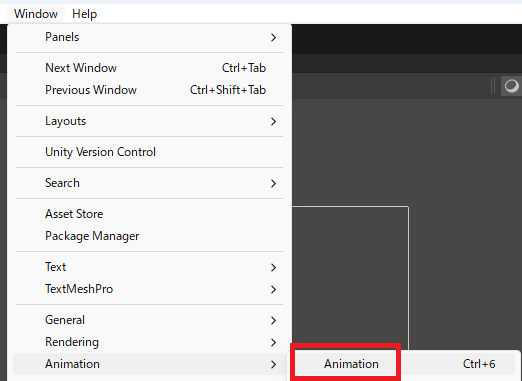
上のメニューバーの「Window」→「Animation」→「Animation」を選択します。
HierarchyからPlayerを選択してAnimationウィンドウの「Create」を選択します。保存先を聞かれるので、Aseetsフォルダ内にAnimationフォルダを作成して指定しておきます。

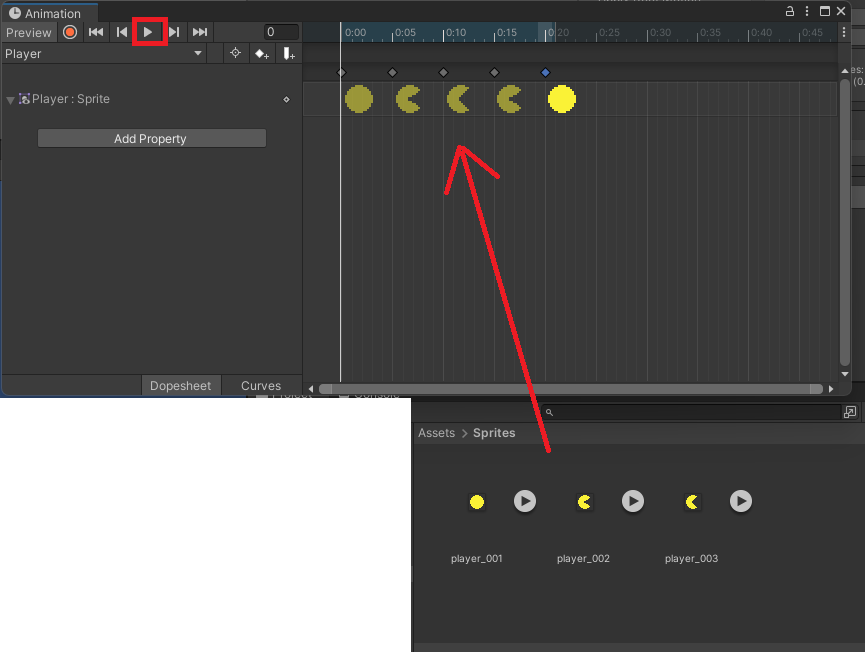
Animationは下記のような順番で画像を指定します。いい感じに動いているかは再生ボタンを押して確認していきます。
アニメーションの作成方法は下記が参考になります。
PlayerスクリプトのStart内に初期の移動方向を追加し、Update内にプレイヤーの回転を追加します。下記は追加部分だけを抜粋してあります。
    private void Start()
    {
        direction = Vector2.right;
    }

    private void Update()
    {
        float angle = Mathf.Atan2(direction.y, direction.x) * Mathf.Rad2Deg;
        transform.rotation = Quaternion.AngleAxis(angle, Vector3.forward);
    }
試しに実行してみると下記のように動きます。
これでプレイヤーの動きがひとまず完成です。