簡単なカードゲーム作成のPart3を進めていきます。今回は「選択したカードの決定して場に出す」のと「対戦相手のカードのセット」をしていきます。
はじめに
今回は第3回目です。第1回目は下記から。
Part1は仮でカードの生成を作成、Part2はカードの配布とカードをクリックして選択するのを実装しました。Part3では「カードを場に出す」、「対戦相手のカード配布」を実装していきます。
ゲーム作成開始
前回は「カードを複数枚セット」するところまで行ったので、その続きから進めていきます。まずは「選択したカードの決定」するからです。
選択カードの決定
カードゲームでは複数のカードから1枚選ぶことになります。そして、カードを選択した時の動作として「カードを場に出す」というのがあります。下図のような感じです。

選択したカードの位置を変更するのでCardScriptのChoiceCard()関数の中でlocalPositionをセットします。下記のようにスクリプトを変更します。
using UnityEngine;
using UnityEngine.UI;

public class CardScript : MonoBehaviour
{
    public void ChoiceCard()
    {
        string num = this.transform.Find("Text").GetComponent<Text>().text;
        transform.localPosition = new Vector3(-400, 250, 0);
    }
}
これで移動するようになりますが、カードを選択すると上にドンドン重なってきます。
これを回避する方法はいくつかありますが、今回はベーシックに「他のカードを選択したら、既に場に出ているカードを元の位置に戻す」を実装していきます。
カードを1枚だけ場に出す
まずは新しいスクリプトを追加します。名前を「Cards」にしてCardsオブジェクトに追加します。
新しく追加したCardsスクリプトの中は下記に変更します。場に出ているカード情報を保管します。
using UnityEngine;

public class Cards : MonoBehaviour
{
    public GameObject SelectCard;
    public Vector3 InitPosition;
}
次にCardScriptを下記のように変更します。カード選択時に「場にカードがあれば元の位置に戻す」、「選択したカード情報を場に出して変数に入れる」です。工夫も何もないべたべた書きです。
using UnityEngine;
using UnityEngine.UI;

public class CardScript : MonoBehaviour
{
    private Cards cards;

    private void Start()
    {
        cards = transform.parent.gameObject.GetComponent<Cards>();
    }
    public void ChoiceCard()
    {
        if (cards.SelectCard != null)
            cards.SelectCard.GetComponent<Transform>().localPosition = cards.InitPosition;

        cards.SelectCard = this.gameObject;
        cards.InitPosition = this.transform.localPosition;

        string num = this.transform.Find("Text").GetComponent<Text>().text;
        transform.localPosition = new Vector3(-400, 250, 0);
    }
}
実行してみて、下記のように場に1枚だけカードが出ればOKです。
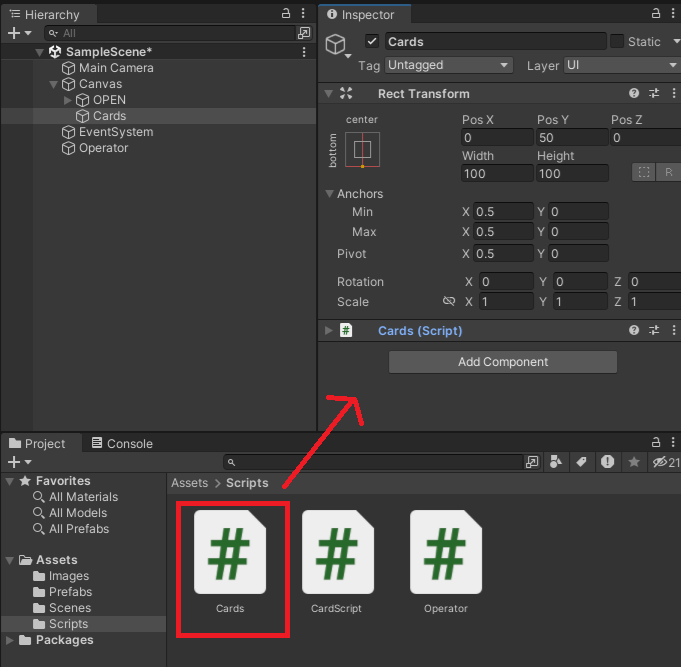
相手のカード作成
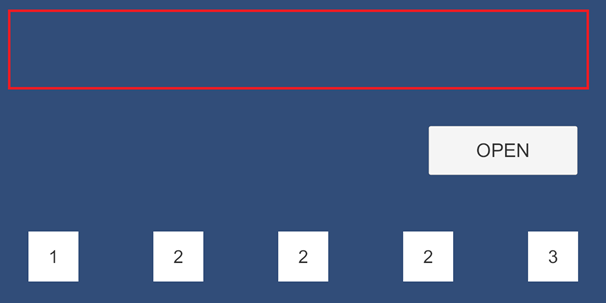
次に相手(敵)のカードを作っていきます。下図の赤枠の位置が相手のカードが並ぶ場所です。
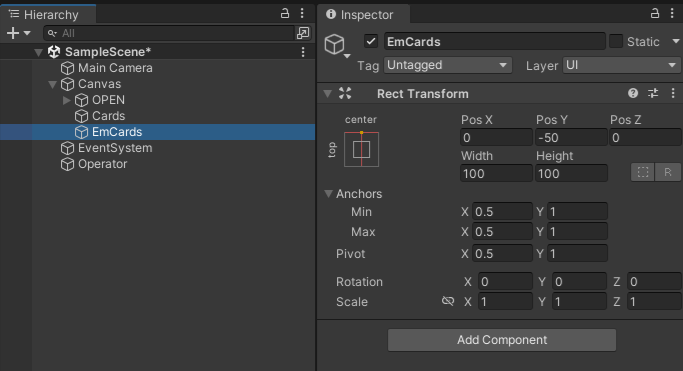
まずはEmCardsという名前でオブジェクトを作成。相手カードの親オブジェクトです。
次にOperatorが相手カードを配るので、Operatorスクリプトを変更します。
EmCardsの変数を追加してパラメータに自分か相手かのオブジェクトを追加。この辺もとりあえずベタ書き。
using UnityEngine;
using UnityEngine.UI;

public class Operator : MonoBehaviour
{
    public GameObject CardPrefab;
    public GameObject Cards;
    public GameObject EmCards;

    private float ad_y_pos = 50.0f;

    private void Start()
    {
        // Player
        dealCards(1, -500, Cards, ad_y_pos);
        dealCards(2, -250, Cards, ad_y_pos);
        dealCards(2, 0, Cards, ad_y_pos);
        dealCards(2, 250, Cards, ad_y_pos);
        dealCards(3, 500, Cards, ad_y_pos);

        // Enemy
        dealCards(1, -500, EmCards, -ad_y_pos);
        dealCards(2, -250, EmCards, -ad_y_pos);
        dealCards(2, 0, EmCards, -ad_y_pos);
        dealCards(2, 250, EmCards, -ad_y_pos);
        dealCards(3, 500, EmCards, -ad_y_pos);

    }

    void dealCards(int number,float position,GameObject parent,float adpos)
    {
        GameObject objCard = (GameObject)Instantiate(CardPrefab);
        objCard.transform.SetParent(parent.transform, false);
        objCard.transform.Find("Text").GetComponent<Text>().text = number.ToString();
        objCard.transform.localPosition = new Vector3(position, adpos, 0);
    }
}
OperatorオブジェクトのEmCards変数にEmCardsオブジェクトをセットします。
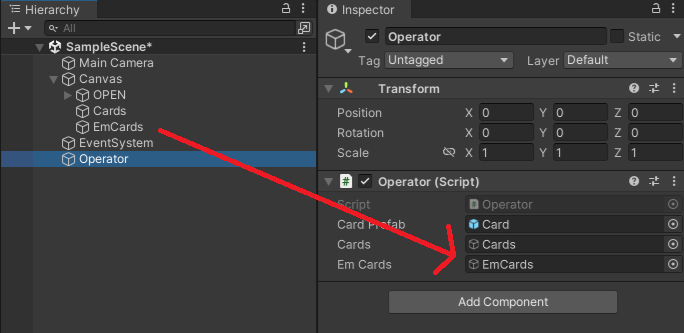
動かしてみて下記のようになればOKです。
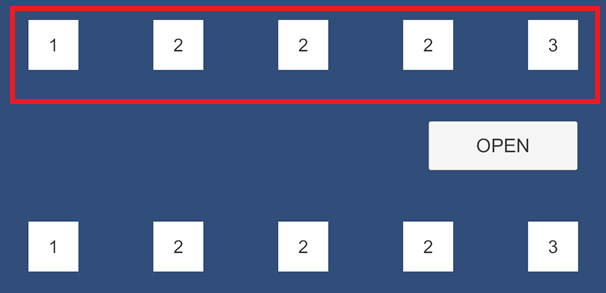
とりあえず、これで「対戦相手(敵)のカードセット完了」です。