「どうぶつしょうぎ」をUnityで作成する。第5回目です。
はじめに
Part1は下記です。
今回やること
パート1では駒の初期配置を作成、パート2では移動先の候補を表示、パート3では駒の移動、パート4では交互に駒を動かすのを実装しました。
今回は「成駒と持ち駒」を実装していきます。
実装開始
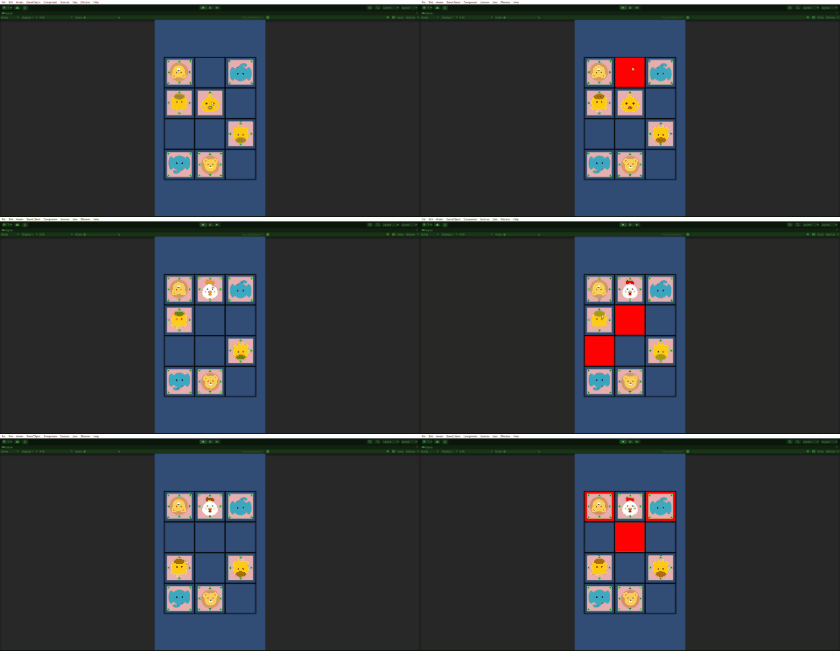
まずは成駒を実装します。どうぶつ将棋の成り駒は、ヒヨコが一番奥のマスに進むとニワトリになります。
成り駒処理
Pieceスクリプトに下記を追加します。駒を動かしたときに条件に該当したらニワトリにします。
using UnityEngine;

public class Piece : MonoBehaviour
{

    public void MovePiece(Vector2 toPos)
    {
        if (this.name == Const.hiyoko)
        {
            //成り駒判定
            if (toPos.y == 0 && GameManager.instance.currentPlayer == Const.player_sky ||
                toPos.y == 3 && GameManager.instance.currentPlayer == Const.player_forest)
            {
                this.name = Const.niwatori;
                gameObject.GetComponent<SpriteRenderer>().sprite = niwatori;
            }

        }

        //省略
        //
    }
}
TileManagerスクリプトにニワトリの移動先候補を追加します。
using UnityEngine;

public class TileManager : MonoBehaviour
{

    public void MoveTileSpawn(string name, int x, int y)
    {
        //タイル削除
        DestroyTile();

        switch (name)
        {
            //省略
            //

            case Const.niwatori:
                if (GameManager.instance.currentPlayer == Const.player_forest)
                {
                    TileSpawn(x, y + 1);
                    TileSpawn(x, y - 1);
                    TileSpawn(x + 1, y);
                    TileSpawn(x - 1, y);
                    TileSpawn(x + 1, y + 1);
                    TileSpawn(x - 1, y + 1);
                }
                else if (GameManager.instance.currentPlayer == Const.player_sky)
                {
                    TileSpawn(x, y + 1);
                    TileSpawn(x, y - 1);
                    TileSpawn(x + 1, y);
                    TileSpawn(x - 1, y);
                    TileSpawn(x - 1, y - 1);
                    TileSpawn(x + 1, y - 1);
                }
                break;
        }
    }
}
実行すると下記のような感じに。ニワトリに成ることができます。

持ち駒にする処理
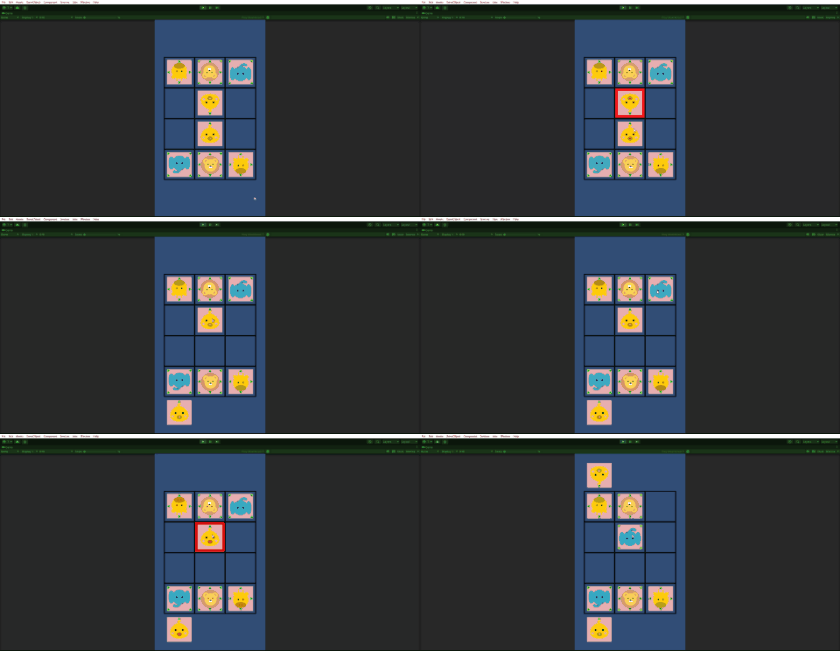
次の持ち駒の処理を追加します。持ち駒は「相手の駒を自分の駒にする」、「持ち駒から盤内打ち出す」の2段階に分けます。まずは自分の持ち駒にしていきます。
Constに持ち駒用の定数を追加します。
public class Const
{
    //省略
    //
    //

    //持ち駒用
    public const int holdforest = 0;
    public const int holdsky = 1;
    public const int holdforestY = -1;
    public const int holdskyY = 4;
    public const int holdRow = 2;
    public const int holdCol = 6;
}
次にGameManagerスクリプトに盤の駒と同じように持ち駒を保管する配列を追加します。0番目の配列に森側の持ち駒、1番目の配列に空側の持ち駒を保管します。
public class GameManager : MonoBehaviour
{

    private GameObject[,] boardpiece;
    private GameObject[,] holdpiece;


    void Start()
    {
        boardpiece = new GameObject[Const.boardRow, Const.boardCol];
        holdpiece = new GameObject[Const.holdRow,Const.holdCol];
    }

    public GameObject GetHoldPiece(int x,int y)
    {
        return holdpiece[x,y];
    }

    public void SetHoldPiece(int x, int y, GameObject obj)
    {
        holdpiece[x, y] = obj;
    }
}
Pieceスクリプトに下記を追加します。所有権の移動、盤外に駒を移動して持ち駒にします。
using UnityEngine;

public class Piece : MonoBehaviour
{

    public void MoveHoldPiece()
    {
        int x = Mathf.RoundToInt(transform.position.x);
        int y = Mathf.RoundToInt(transform.position.y);

        //盤内をnullに
        GameManager.instance.SetBoardPieceNull(x, y);

        //にわとり->ヒヨコに戻す
        if (this.name == Const.niwatori)
        {
            this.name = Const.hiyoko;
            gameObject.GetComponent<SpriteRenderer>().sprite = hiyoko;
        }

        //所有権移動
        int holdX;
        int holdY;
        if (ownership == Const.player_forest)
        {
            ownership = Const.player_sky;
            transform.rotation = Quaternion.Euler(0, 0, 180);
            holdX = Const.holdsky;
            holdY = Const.holdskyY;
        }
        else
        {
            ownership = Const.player_forest;
            transform.rotation = Quaternion.Euler(0, 0, 0);
            holdX = Const.holdforest;
            holdY = Const.holdforestY;
        }

        //持ち駒配列にセット
        for (int i = 0; i < Const.holdCol; i++)
        {
            if (GameManager.instance.GetHoldPiece(holdX, i) == null)
            {
                GameManager.instance.SetHoldPiece(holdX, i, this.gameObject);

                //駒移動
                transform.position = new Vector2(i, holdY);
                break;
            }
        }
    }
}
Tileスクリプトに持ち駒にする処理を追加します。
using UnityEngine;

public class Tile : MonoBehaviour
{
    private void OnMouseUp()
    {

        if (pieceExist)
        {
            int x = Mathf.RoundToInt(transform.position.x);
            int y = Mathf.RoundToInt(transform.position.y);

            //タイル上の駒を削除
            GameObject tilepiece = GameManager.instance.GetBoardPiece(x, y);

            //ライオンなら終了
            if (tilepiece.name == Const.raion) GameManager.instance.GameOver();

            //ライオン以外は持ち駒にする
            //Destroy(tilepiece);
            tilepiece.GetComponent<Piece>().MoveHoldPiece();

        }

        //省略
        //省略
    }
}
実行すると下記のように相手の駒を自分の駒にすることができます。

持ち駒から盤内に打つ処理
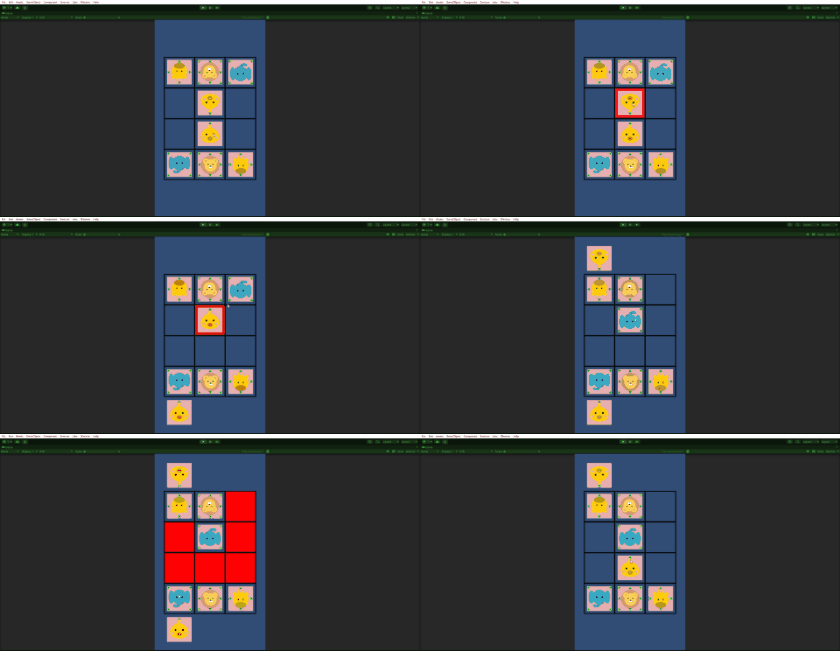
盤外から駒を打ち出す処理を作成していきます。
まずはGameManagerに下記を追加します。盤内の駒情報を返します。
using UnityEngine;

public class GameManager : MonoBehaviour
{

    public GameObject[,] GetBoardAllPiece()
    {
        return boardpiece;
    }
}
TileManagerスクリプトに下記を追加します。持ち駒から盤内に駒を打ち出すときは盤内に駒のない場所(null)が対象となります。
using UnityEngine;

public class TileManager : MonoBehaviour
{

    public void MoveTileSpawn(string name, int x, int y)
    {
        //タイル削除
        DestroyTile();

        if (y == Const.holdforestY || y == Const.holdskyY)
        {
            HoldTileSpawn();
            return;
        }

        //省略
        //省略

    }


    private void HoldTileSpawn()
    {
        GameObject[,] obj = GameManager.instance.GetBoardAllPiece();
        for (int x = 0; x < obj.GetLength(0); x++)
        {
            for (int y = 0; y < obj.GetLength(1); y++)
            {
                GameObject piece = GameManager.instance.GetBoardPiece(x, y);
                if (piece == null)
                {
                    Instantiate(_tile, new Vector3(x, y), Quaternion.identity, this.transform);
                }
            }
        }
    }
}
Pieceスクリプトに下記を追加します。持ち駒から移動したときの処理を追加しています。
using UnityEngine;

public class Piece : MonoBehaviour
{

    public void MovePiece(Vector2 toPos)
    {
        int x = Mathf.RoundToInt(transform.position.x);
        int y = Mathf.RoundToInt(transform.position.y);

        if (GameManager.instance.OnBoardCheck(x, y))
        {
            GameManager.instance.SetBoardPieceNull(x, y);
            if (this.name == Const.hiyoko)
            {
                //成り駒判定
                if (toPos.y == 0 && GameManager.instance.currentPlayer == Const.player_sky ||
                    toPos.y == 3 && GameManager.instance.currentPlayer == Const.player_forest)
                {
                    this.name = Const.niwatori;
                    gameObject.GetComponent<SpriteRenderer>().sprite = niwatori;
                }
            }
        }
        else
        {
            int holdX;
            if (ownership == Const.player_forest)
            {
                holdX = Const.holdforest;
            }
            else
            {
                holdX = Const.holdsky;
            }

            //持ち駒から移動
            GameManager.instance.SetHoldPiece(holdX, x, null);

        }

        //駒移動
        transform.position = toPos;
        GameManager.instance.SetBoardPiece(this.gameObject);

        //タイル削除
        TileManager.DestroyTile();
    }

}
実行すると下記のような感じに。持ち駒のサイズは変更したほうが良いかもですね。

ここからは、UI作成、スクリプトの整理、タイルはオブジェクトプールを利用するなどの最適化に加えて、動き、音などを加えることになりますが、基本的な「どうぶつしょうぎ」の動きは完成です。

