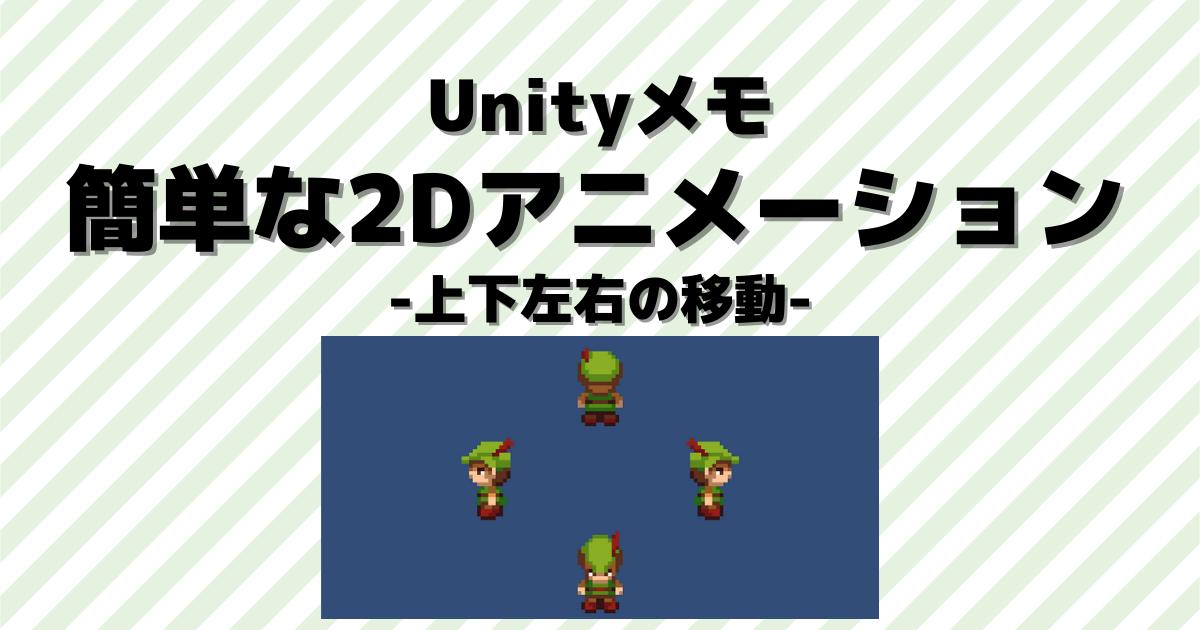
今回はUnityでトップダウン式2Dゲームを作成する際に使えそうな、上下左右の移動アニメーション作成していきます。
はじめに
Unityのバージョンは2021.3.14f1で作成しています。
下記のように上下左右に移動するときのアニメーションを実装していきます。
事前準備
まずはアセットストアから素材を入手。
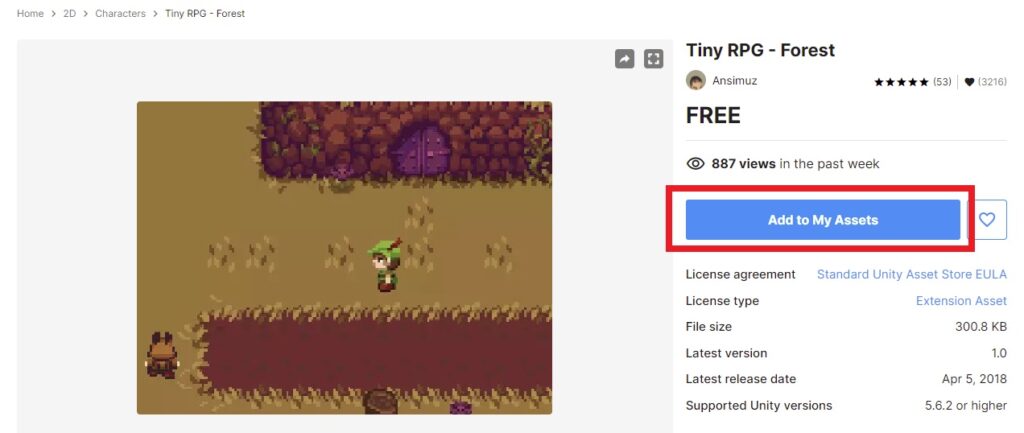
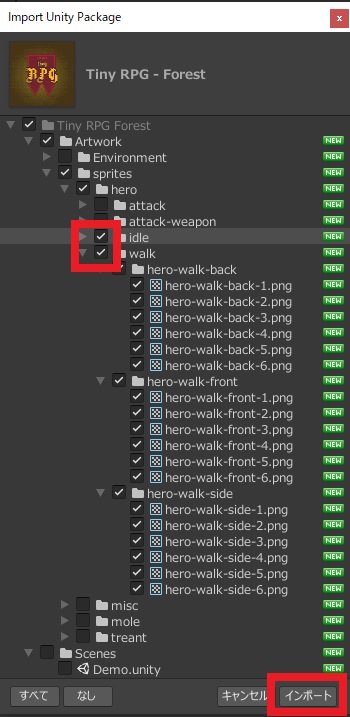
dileフォルダとwalkフォルダを選択してインポートしておきます。
インポートした画像をすべて選択して、「PixelsPerUnit」を10に変更しておきます。

実装開始
ここから実際に作成していきます。
プレイヤーの作成
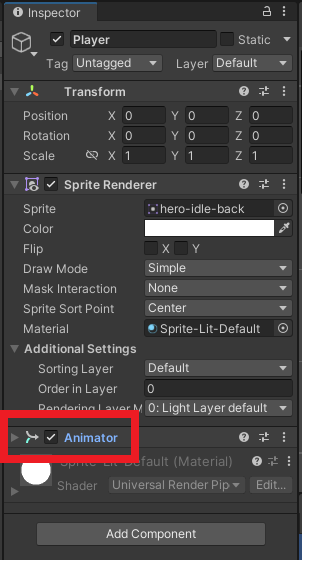
まずは後ろ向きの画像をSceneにドラッグアンドドロップします。
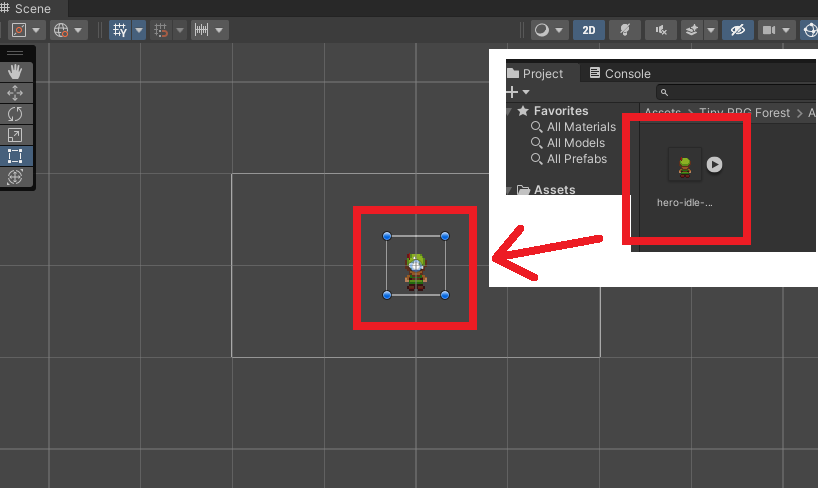
名前をPlayerに変更して、AddComponentから「Animator」を追加しておきます。
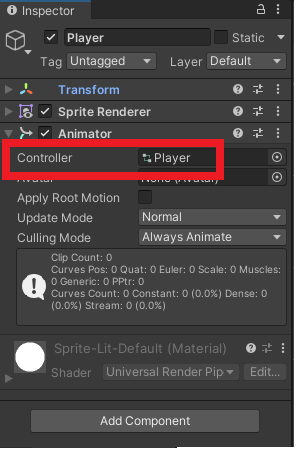
Assetsフォルダ内で右クリック、「AnimatorController」を作成します。

Controllerにくっつけておきます。
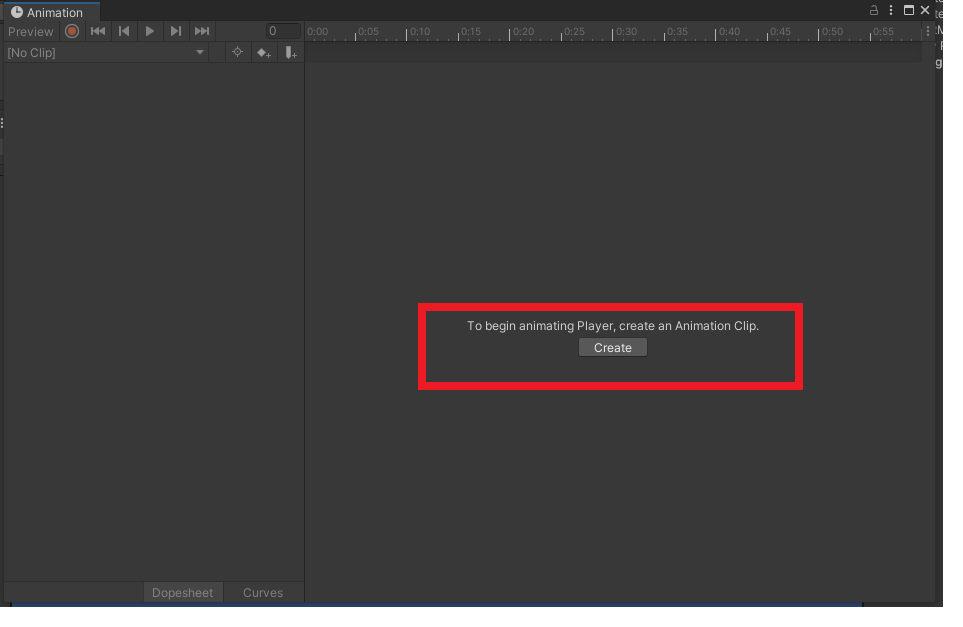
アニメーションクリップの作成
アニメーションウィンドウを開いて、アニメーションクリップを作成します。「Create」を選択。
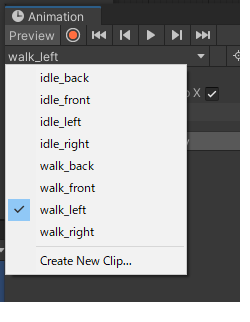
停止状態のアニメーションクリップ
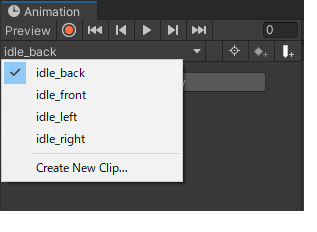
上下左右、それぞれの停止状態のクリップを作成するので、「idle_back」、「idle_front」、「idle_right」、「idle_left」の4つを「CreateNewClip…」から作成します。
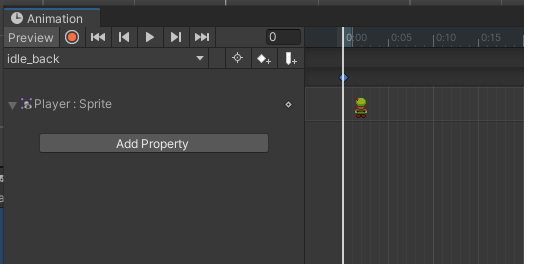
対応する画像をそれぞれドラッグアンドドロップします。下記は後ろ向きの場合。
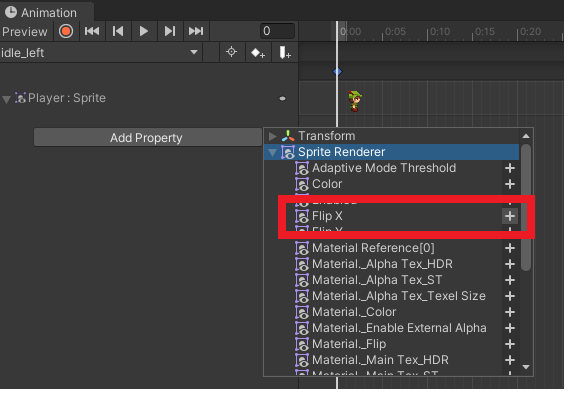
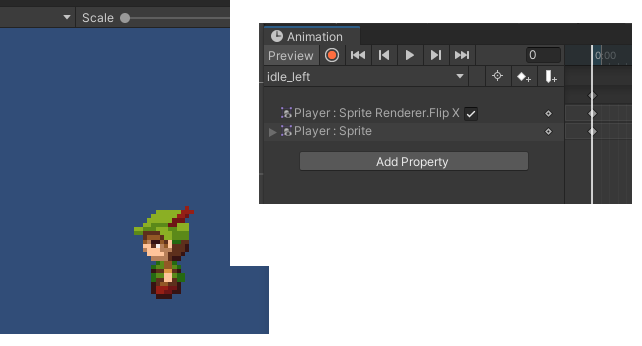
左向きの画像はないので、「idle_left」は右向きの画像を反転させます。「AddProperty」から「FilpX」を追加してチェックします。
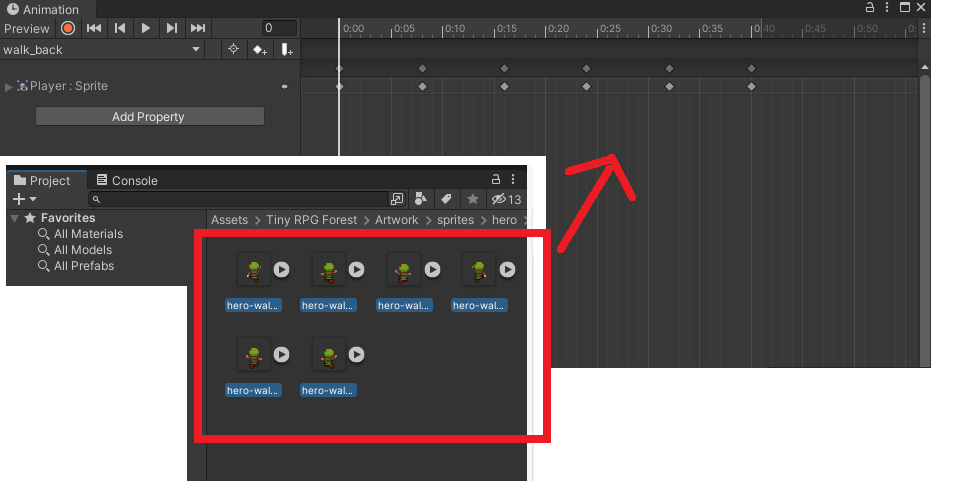
歩くアニメーションクリップの作成
同じようにwalkのクリップも4つ作成します。
対応する画像をすべて選択してドラッグアンドドロップします。
下記記事では「左右の移動」に絞ってアニメーションの作成を実装しているので、参考になるかと思います。
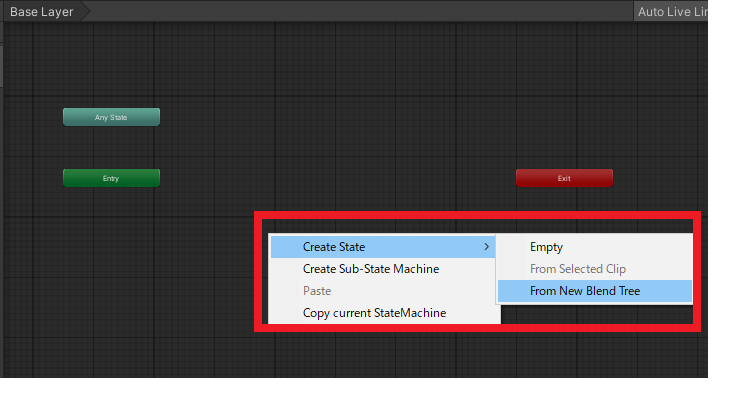
待機状態のブレンドツリーの作成
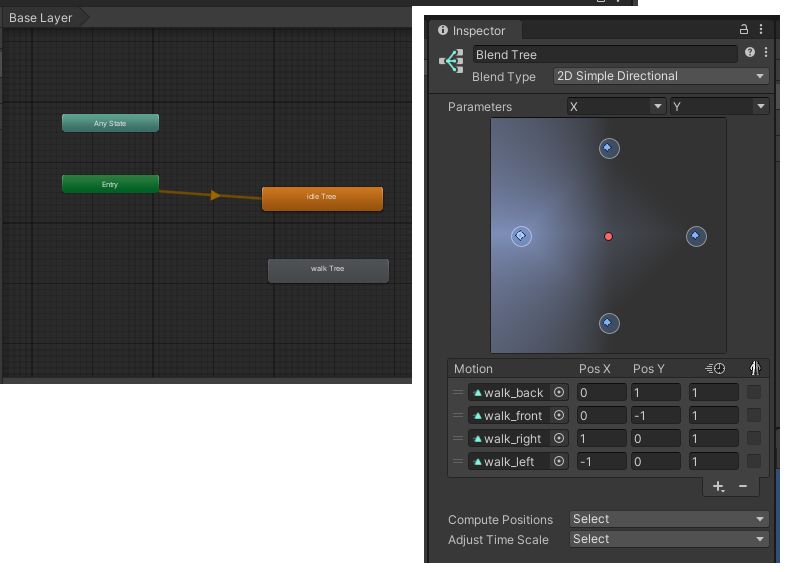
Animatorを開くと、下記のように8つのアニメーションクリップがあります。
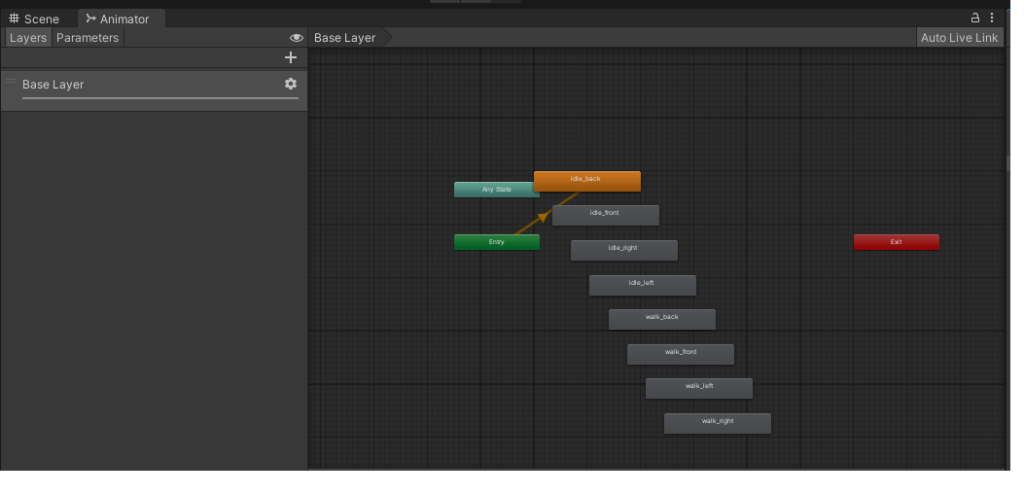
8つ全てを削除し、右クリックして「FromNewBlendTree」を選択します。
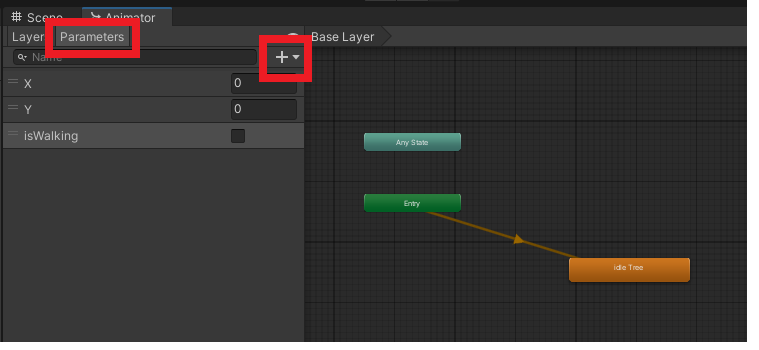
追加したブレンドツリーの名前をidleTreeに変更。Parametersにfloat型でXとY、bool型でisWalkingを追加します。
idleTreeをダブルクリックして、ブレンドタイプを「2DsimpleDirectional」に変更。ParametersをXとYに、モーションを追加して4つにします。
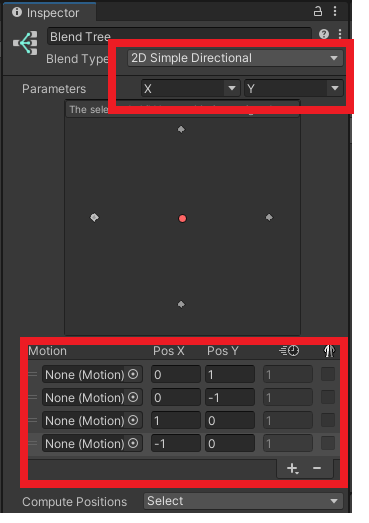
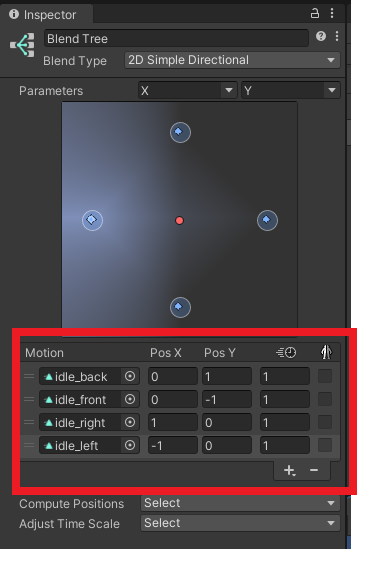
各モーションにアニメーションクリップを割り当てます。Xが横方向、Yが縦方向です。
停止スクリプトの作成
下記スクリプトを作成してPlayerにアタッチします。
using UnityEngine;

public class PlayerMove : MonoBehaviour
{
    private Animator anim;
    private Vector2 movement;

    private float speed = 5.0f;

    private void Awake()
    {
        anim = GetComponent<Animator>();
    }

    private void Update()
    {
        movement.x = Input.GetAxisRaw("Horizontal");
        movement.y = Input.GetAxisRaw("Vertical");

        if (movement != Vector2.zero)

        {
            anim.SetFloat("X", movement.x);
            anim.SetFloat("Y", movement.y);
        }
    }
}
キー入力でmovement変数に値を代入し、movement変数をアニメーターのパラメータにそのままセットしているという感じですね。
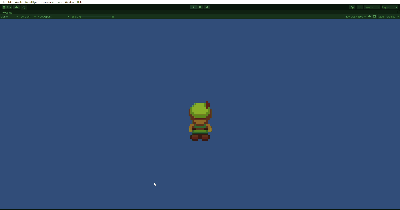
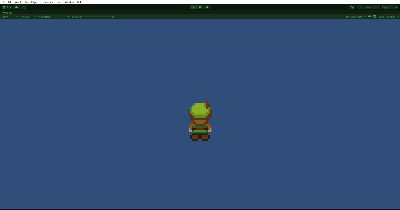
試しに実行してみて、上下左右キーを押してみます。現時点では待機状態しか設定していないので、下記のようにキャラクターの向きが変わればOK。
歩くアニメーションの実装
ブレンドツリーをコピーしてwalkも同じように作成します。
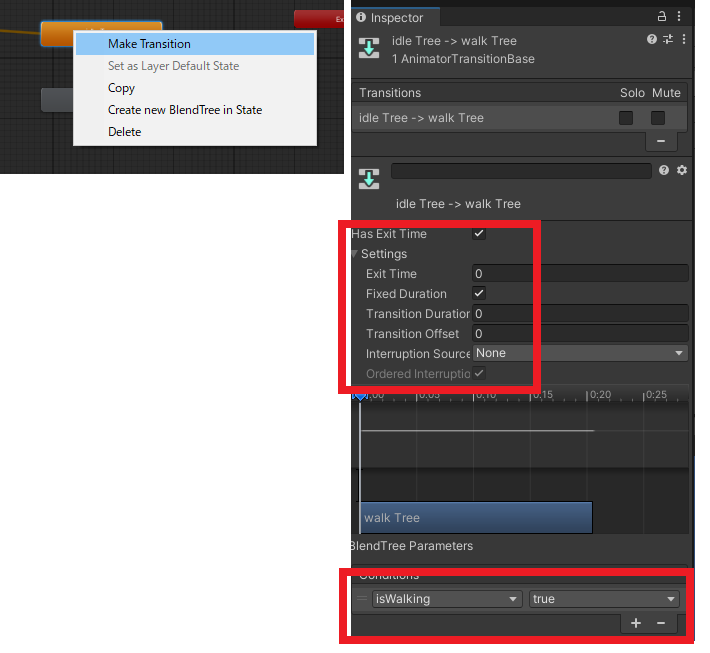
idle Treeで右クリックして「MakeTransition」を選択。
停止状態から歩く状態への移動はisWalkingがtrueの時とします。また、Settingsを下記のように変更しておきます。反対方向(歩く状態から停止状態)はisWalkingがfalseの時でセットしておきます。
移動スクリプトの作成
最後にスクリプトを作成してPlayerオブジェクトに突っつければ完成です。スクリプト名はPlayerMovingにして中身は下記の様に変更。
using UnityEngine;

public class PlayerMove : MonoBehaviour
{
    private Rigidbody2D _rb;
    private Animator anim;
    private Vector2 movement;

    private float speed = 5.0f;

    private void Awake()
    {
        _rb = GetComponent<Rigidbody2D>();
        anim = GetComponent<Animator>();
    }

    private void Update()
    {
        movement.x = Input.GetAxisRaw("Horizontal");
        movement.y = Input.GetAxisRaw("Vertical");
        anim.SetBool("isWalking", movement != Vector2.zero);
        if (movement != Vector2.zero)
        {
            anim.SetFloat("X", movement.x);
            anim.SetFloat("Y", movement.y);
        }
    }
    private void FixedUpdate()
    {
        _rb.MovePosition(_rb.position + movement.normalized * speed * Time.fixedDeltaTime);
    }
}
スクリプト変更後、PlayerにAddComponentからRigidBody2DをアタッチしGravityを0にします。
実行してキー入力でキャラクターが動けばOK