Unity2DゲームでSpringJoint2Dを利用して、バネのような動きを実装してみます。
はじめに
Unityのバージョンは2021.3.14f1です。下記、公式リファレンスでは、SpringJoint2Dは「バネでつながったような物理挙動に制御される」とあります。

実装開始
動きを確認しながら実装してみます。
オブジェクトの作成
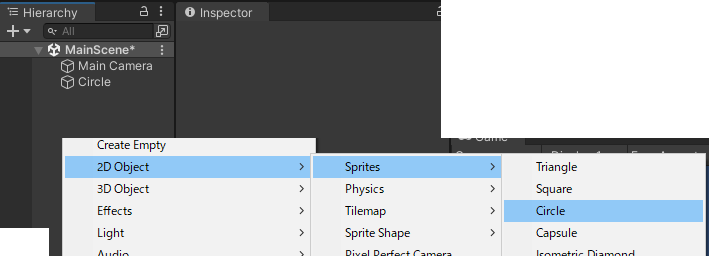
「2DObject」→「Sprites」→「Circle」を追加します。
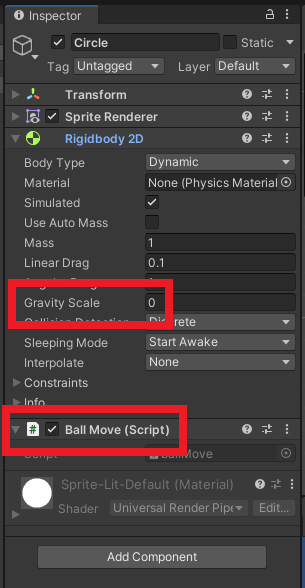
「AddComponent」から「Rigidbody2D」をアタッチして重力を0に。BallMoveと言う名前でスクリプトを作成してアタッチします。
スクリプトの中身を下記にします。左右の入力でオブジェクトに力を加えます。
using UnityEngine;

public class ballMove : MonoBehaviour
{
    private float _force = 10.0f;
    private Rigidbody2D _rb;

    private void Start()
    {
        _rb = GetComponent<Rigidbody2D>();
    }

    void Update()
    {
        float InputX = Input.GetAxisRaw("Horizontal");

        if (InputX != 0)
            _rb.AddForce(Vector2.right * InputX * _force);
    }
}
実行して、キーボードの「D」を押すと下記のような動きになります。
バネを追加(SpringJoint2D)
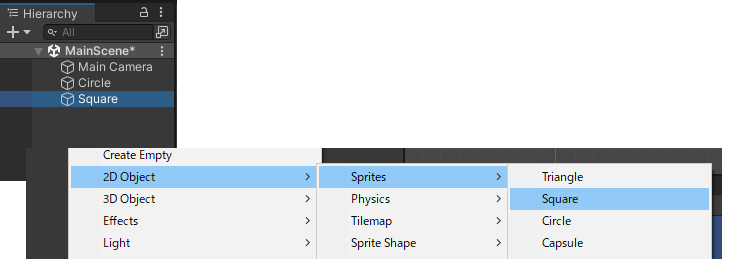
「2DObject」→「Sprites」→「Square」を追加します。
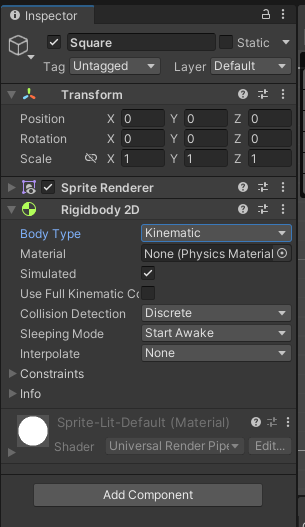
「Add Component」から「Rigidbody 2D」をアタッチします。BodyTypeを「Kinematic」にします。
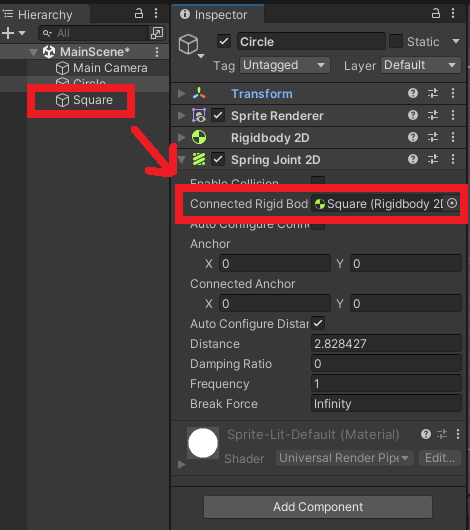
Circleオブジェクトに「SpringJoint2D」をアタッチして、ConnectedRigidBodyにSquareを指定します。
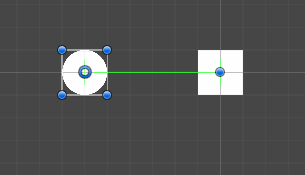
シーンで確認すると、下記のような感じでつながります。緑色がバネの部分になります。
実行してキーボードの「A」や「D」を押してみると、下記のようにバネではじかれるような動きになります。(分かりにくいですが・・・)
バネをlineRendererで表示
Circleのままでは分かりにくいので名前をplayerに変更、Squareはblockに変更しておきます。
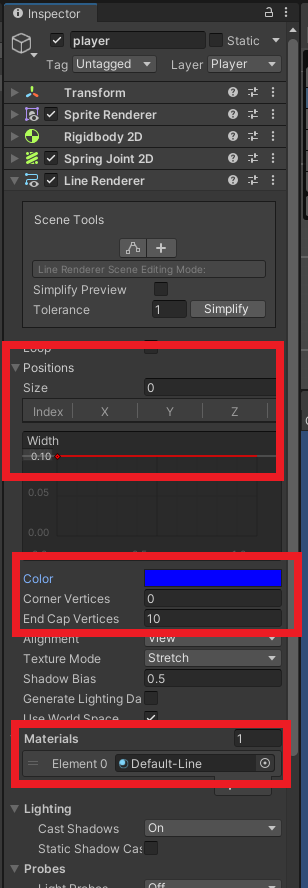
playerにLineRendererをアタッチして、Positionsのサイズを0に、幅や色は好きなのに変更しておきます。
下記スクリプトを作成します。LineRendererのポジションをセットしているだけです。
using UnityEngine;

public class grap : MonoBehaviour
{
    [SerializeField] private GameObject block;
    private LineRenderer line;

    void Start()
    {
        line = GetComponent<LineRenderer>();
        line.positionCount = 2;
    }

    void Update()
    {
        line.SetPosition(0, transform.position);
        line.SetPosition(1, block.transform.position);
    }
}
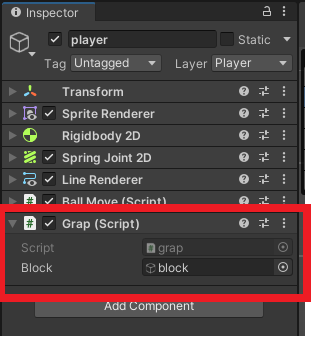
playerにスクリプトをアタッチして、blockをセットします。
実行すると下記のようにバネが可視化されます。
ブロックを増やして、ブロックをクリックしたらバネを付け替える感じにすると下記のようになります。