今回はUnityで「ベルトコンベアみたいな動く床」の実装メモです。
キー入力で操作するプレイヤーがいて、床に乗るとプレイヤーが勝手に動くみたいな感じです。アクションゲームやシミュレーションゲームとかにあったりする感じのものですね。
実装開始
今回使用するのは「Unity 2020.3.26f1」ヴァージョン。3Dで作成していきます。
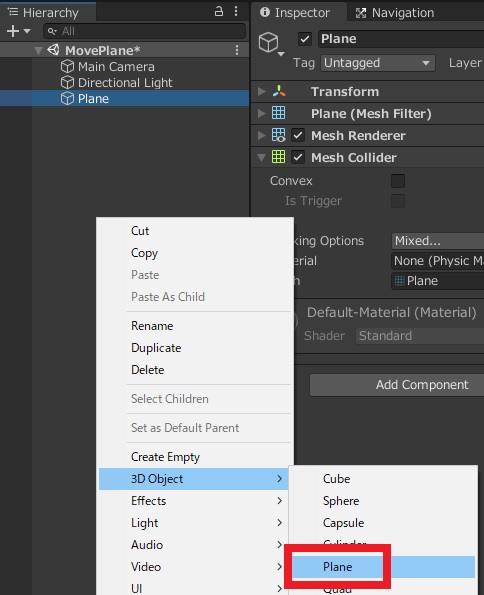
まずはPlane(平面)を2つ追加。
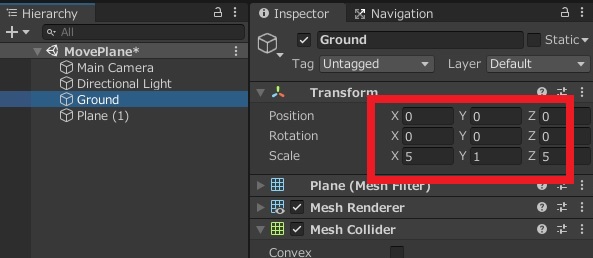
一つは全体の地面とするのでスケールを大きく変更。名前をGroundにしておきます。
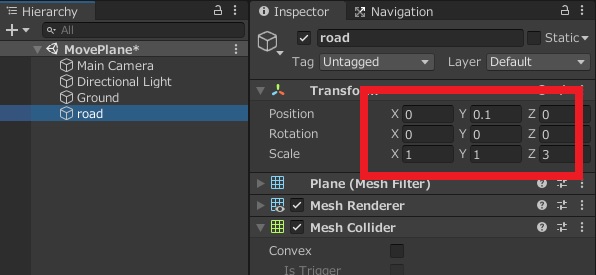
もう一つを動く床にしていきます。名前をroadにしておきます。
カメラ位置は適当に好きなように変更。

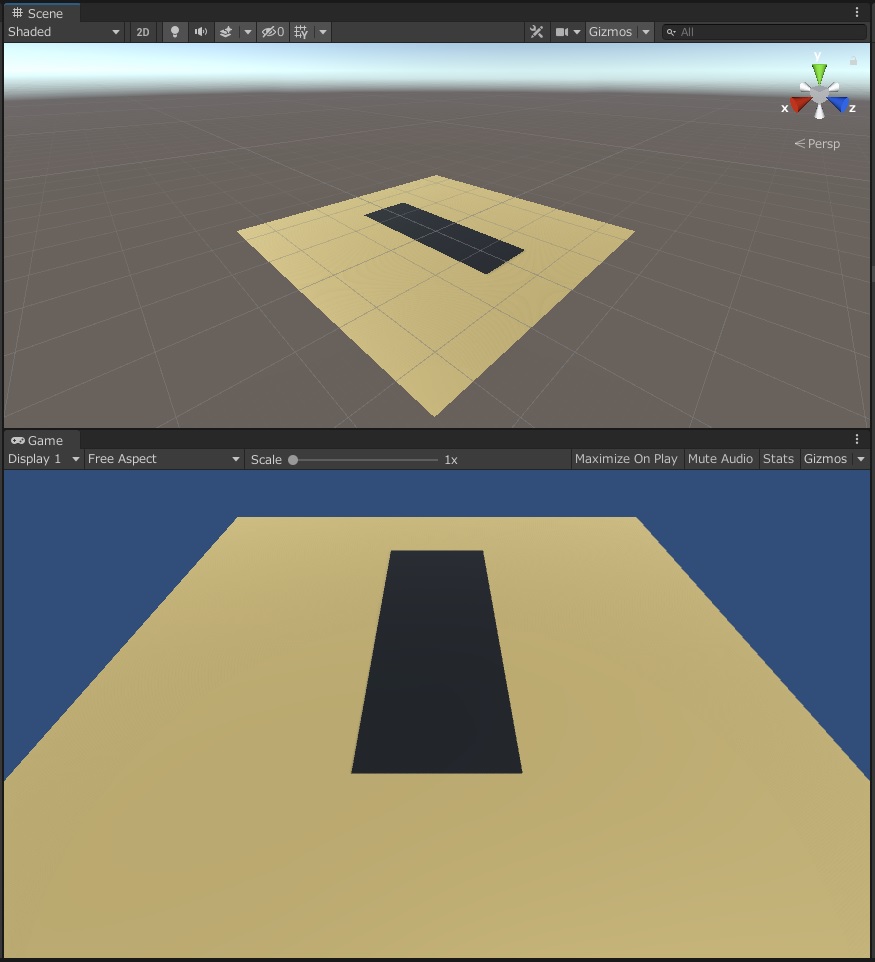
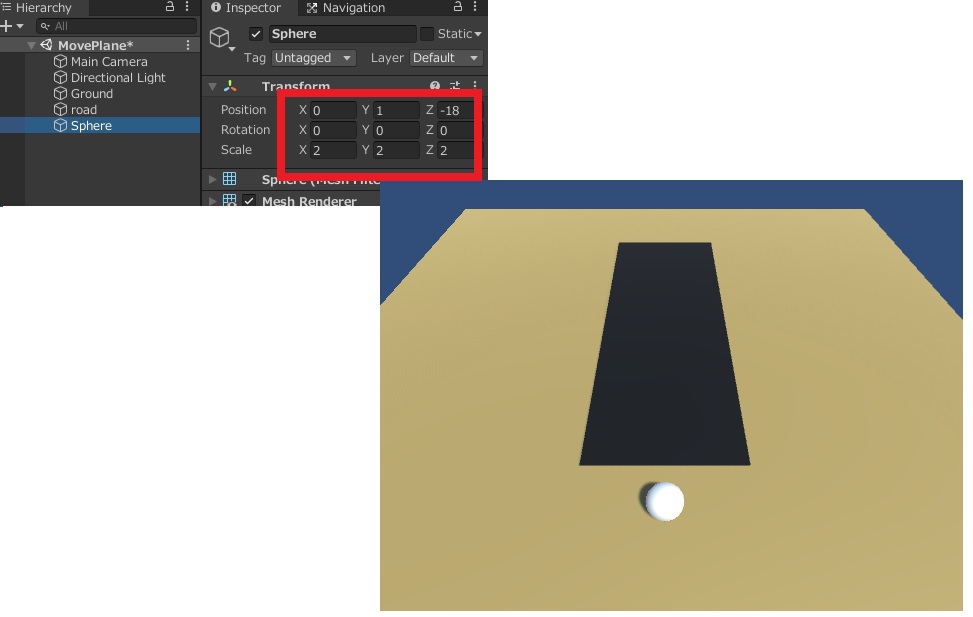
見分けがつきやすいようにマテリアルを適当に設定して、下記のような感じにしておきます。
黒い部分が動く床になる場所です。
プレイヤーの実装
次にプレイヤーを作成していきます。
球体(Sphere)を追加して、ポジションとスケール変更。Cubeでも問題なし。
球体をキー操作できるようにするので「Rigidbody」、「Collider」、「PlayerInput」とスクリプト(PlayerMovement)を追加。
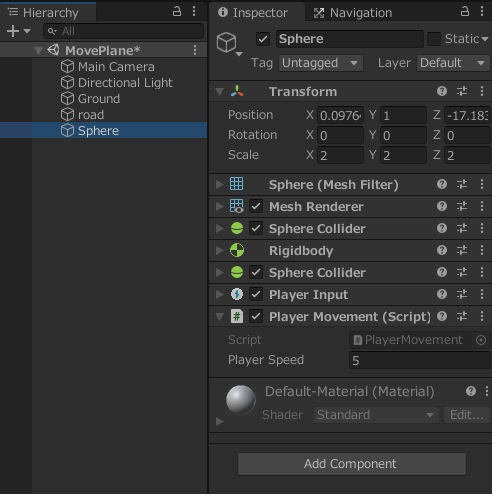
プレイヤーを動かすスクリプトの中身は下記に変更。
using System.Collections;
using System.Collections.Generic;
using UnityEngine;
using UnityEngine.InputSystem;

public class PlayerMovement : MonoBehaviour
{
    [SerializeField] private float PlayerSpeed;

    private Rigidbody _rigidbody;
    private Vector3 movement;

    void Start()
    {
        _rigidbody = GetComponent<Rigidbody>();
    }
    void OnMove(InputValue movementValue)
    {
        Vector2 movementVector = movementValue.Get<Vector2>();
        movement = new Vector3(movementVector.x, 0.0f, movementVector.y);
    }
    void Update()
    {
        _rigidbody.velocity = movement * PlayerSpeed;
    }
}
プレイヤーの移動方法については下記で詳しく書いています。

動く床の実装
次に動く床を実装します。
正確には床が動くのではなく、「床の上に乗ったプレイヤーに速度を加える」ことで床が動いている様に感じさせます。
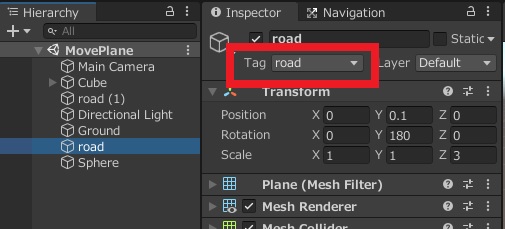
まずは動く床部分にタグをセット。
プレイヤーを動かすスクリプトを下記に変更。
using System.Collections;
using System.Collections.Generic;
using UnityEngine;
using UnityEngine.InputSystem;

public class PlayerMovement : MonoBehaviour
{
    [SerializeField] private float PlayerSpeed;
    [SerializeField] private Vector3 Roadforward;
    [SerializeField] private float RoadSpeed;

    private Rigidbody _rigidbody;
    private Vector3 movement;
    private Vector3 roadmove;

    void Start()
    {
        _rigidbody = GetComponent<Rigidbody>();
    }
    void OnMove(InputValue movementValue)
    {
        Vector2 movementVector = movementValue.Get<Vector2>();
        movement = new Vector3(movementVector.x, 0.0f, movementVector.y);
    }
    void Update()
    {
        _rigidbody.velocity = movement * PlayerSpeed + roadmove;
    }
    private void OnCollisionEnter(Collision collision)
    {
        if(collision.gameObject.CompareTag("road"))
        {
            roadmove = Roadforward * RoadSpeed;
        }
    }
    private void OnCollisionExit(Collision collision)
    {
        if(collision.gameObject.CompareTag("road"))
        {
            roadmove = Vector3.zero;
        }
    }
}
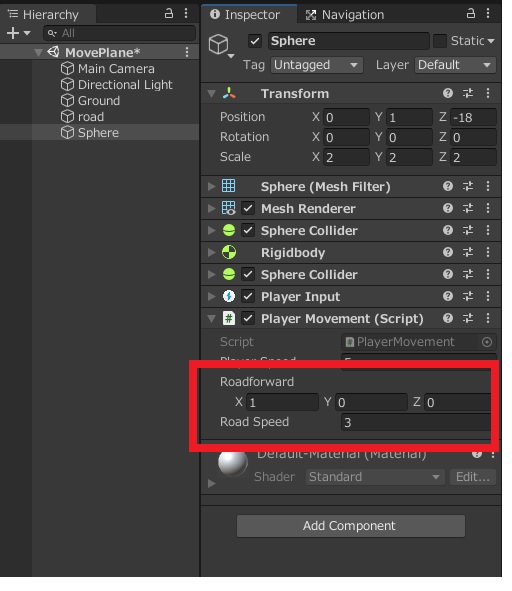
床の上に乗った場合のみ、指定した速度を加えるようにしています。
あとはパラメータで「どの方向」に「どれだけの速度」を加えるのかを指定。
例えば、右に動く場合は下記の様な画像を用意して
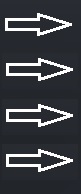
マテリアルを変更して、スクリプトを追加。
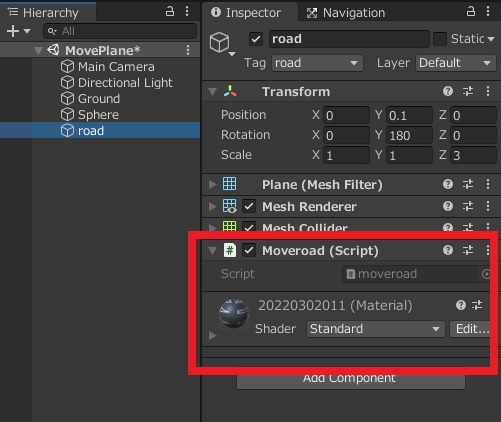
スクリプトの中身を下記に変更。
using System.Collections;
using System.Collections.Generic;
using UnityEngine;

public class moveroad : MonoBehaviour
{

    float scrollSpeed = -0.5f;
    Renderer rend;

    void Start()
    {
        rend = GetComponent<Renderer>();
    }

    void Update()
    {
        float offset = Time.time * scrollSpeed;
        rend.material.SetTextureOffset("_MainTex", new Vector2(offset, 0));
    }
}
下のような感じに、動く方向を可視化出来たり。
スクリプトは下記リファレンスをほぼそのまま利用。