
Unityで導火線のようなエフェクトを実装してみます。「ParticleSystem」を利用して簡単に実装していきます。
はじめに
「Unity 2022.3.14f1」ヴァージョンで作成しています。以前作成したカウントダウンのタイマーを改造して、ParticleSystemでエフェクトを追加してみます。
まずは横バーのカウントダウンタイマーを作成します。関連記事の下記部分までですね。
実装開始
作成した横バーのカウントダウンタイマーを変更していきます。まずはバーを細くするので、TimerとFillの幅を変更します。
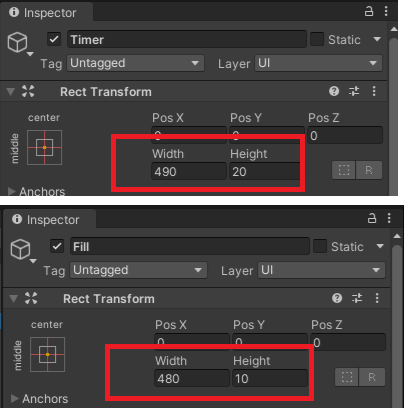
下記のように細長くなればOKです。TimerTextは消しておきます。

ParticleSystemの追加
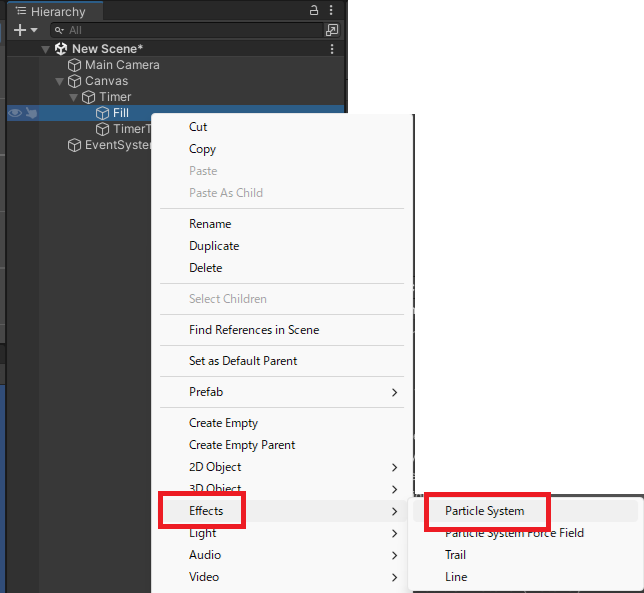
Fillの配下に「Effects」→「ParticleSystem」を追加します。
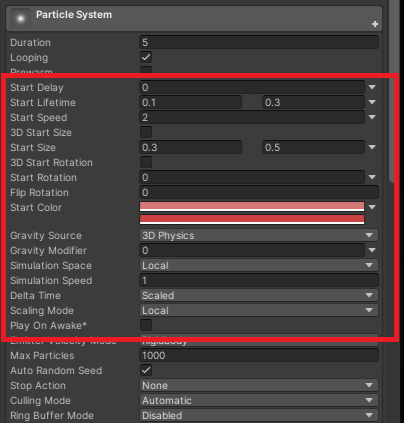
ParticleSystemで色や速度、サイズなどを変更します。
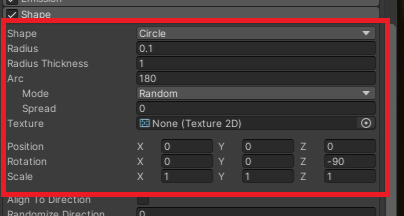
Shapeは半円上にします。
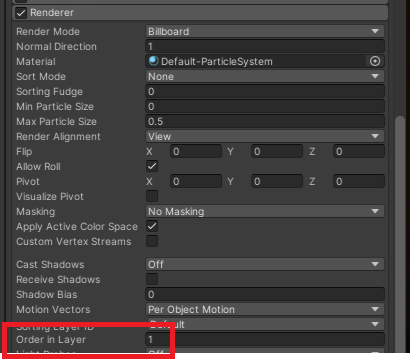
Rendererで「Order in Layer」を変更して手前に表示します。
実際にシーン画面で再生してみていい感じになるように調整します。個人的にはParticleSystem、Emission、Shape、Rendererで調整して、ほかの項目は触らないことが多いです。
スクリプトを作成
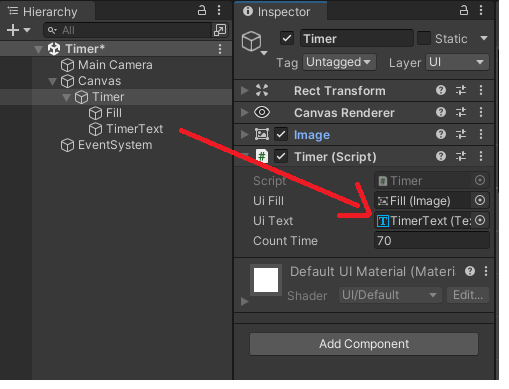
スクリプトを下記に変更します。バーの進行具合に合わせてエフェクト位置も変更しています。サンプルなのでベタ打ちです。実際にはオブジェクト位置などから算出する方が良いです。
using UnityEngine;
using UnityEngine.UI;

public class Timer : MonoBehaviour
{
    [SerializeField] private Image uiFill;
    [SerializeField] private float CountTime;

    [SerializeField] private RectTransform particleTransform;
    [SerializeField] private ParticleSystem particlesystem;

    private void Start()
    {
        particlesystem.Play();
    }

    private void Update()
    {
        float timer = CountTime - Time.time;
        int minutes = Mathf.FloorToInt(timer / 60);
        int seconds = Mathf.FloorToInt(timer % 60);

        uiFill.fillAmount = Mathf.InverseLerp(0, CountTime, timer);
        ParticlePosChange(uiFill.fillAmount);
    }

    private void ParticlePosChange(float amount)
    {
        float x = (amount * 480) - 240;
        particleTransform.localPosition = new Vector3(x, 0, 0);
    }
}
パラメータをセットします。

実行してみると下記のような感じになります。
「ParticleSystem」については下記でも記事に書いてます。DOTweenを利用したアニメーションやParticleSystemを利用することで見た目(UI)を簡単に変更できますね。
