Unityでマス目にあわせて「1マスずつ移動する方法」を実装していきます。
はじめに
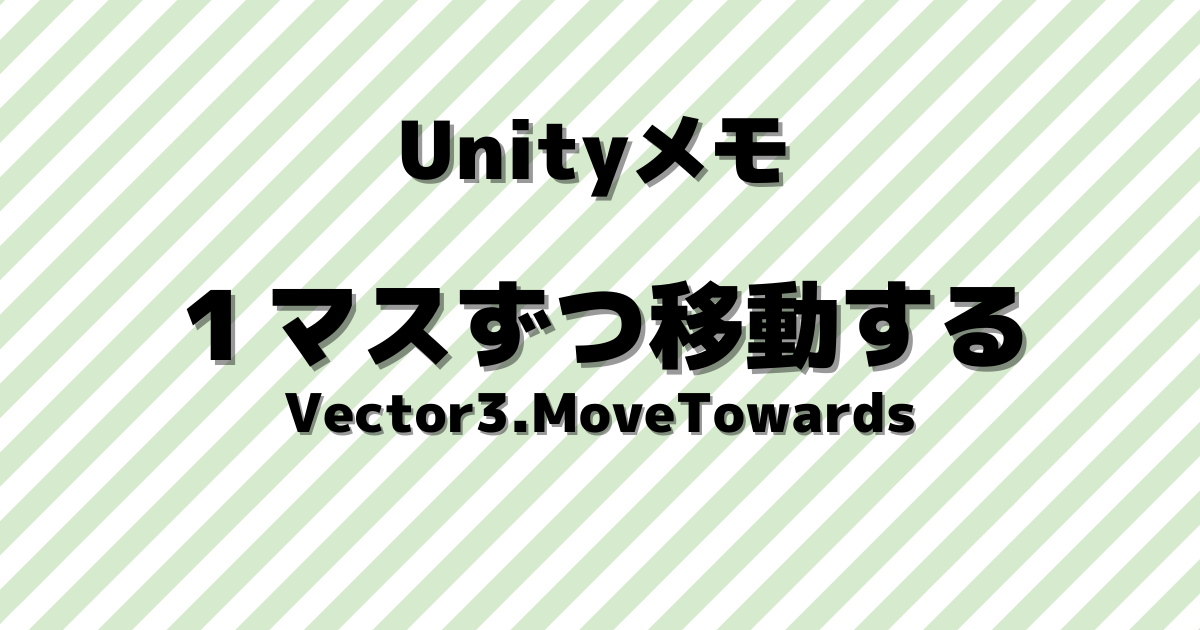
Unityのバージョンは2021.3.14f1です。キー入力で1マス(あらかじめ決められた距離)移動するのを実装します。下記のような感じです。
一昔前のトップダウン式の2DRPGやシミュレーション系のゲームで使われている動きですね。シンプルに作成していきます。
実装開始
簡単な画面を作成して、スクリプトで実装します。シンプルに作成するので、特に準備するものはないです。
画面作成
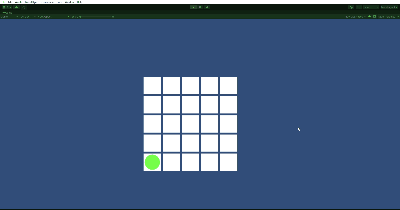
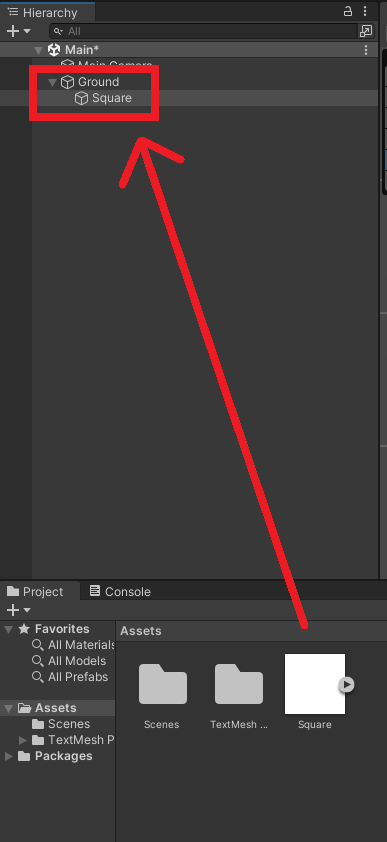
まずはマス目となる画像を作成します。Assetsフォルダ内で「Create」→「2D」→「Sprite」→「Square」を追加。
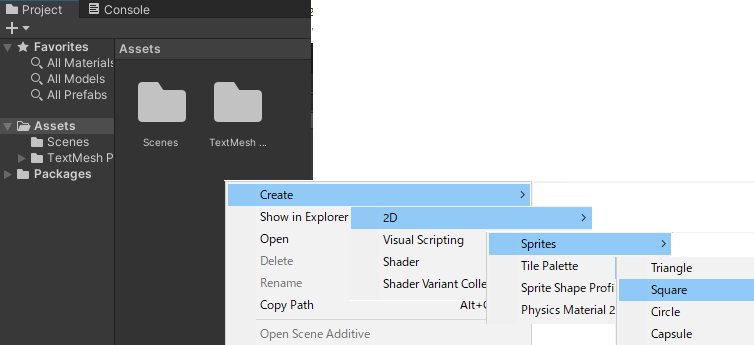
次にマス目の親となる地面を作成します。「Create Empty」で空のオブジェクトを追加します。名前を「Ground」に変更しておきます。
Groundの配下にSquareを追加します。
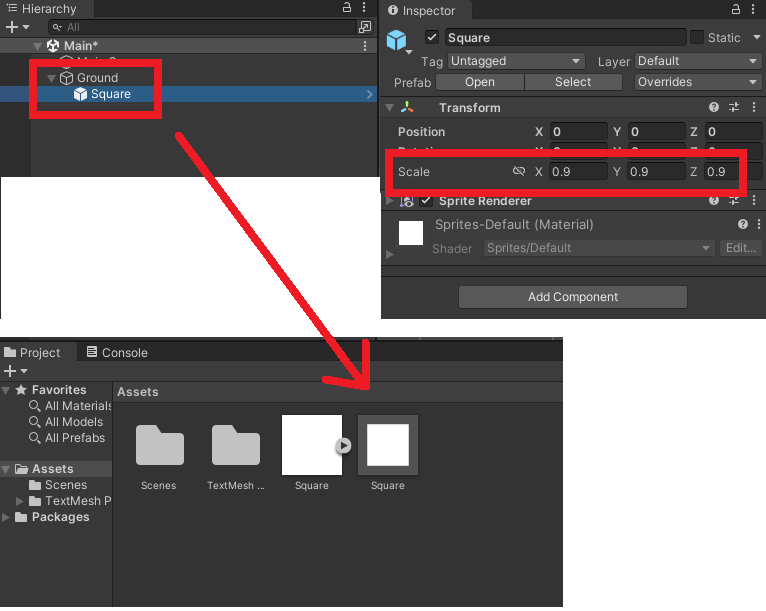
Squareのスケールを0.9に変更し、プレハブ化します。プレハブ化したらGround配下のSquareは削除しておきます。
プレハブを複製して地面を作成しても良いですが、スクリプトでプレハブを並べていきます。下記スクリプトを作成して、指定分のマス目を生成していきます。
using UnityEngine;

public class Ground : MonoBehaviour
{
    [SerializeField] private GameObject _tile;
    [SerializeField] private int _rows = 5;
    [SerializeField] private int _cols = 5;

    private void Start()
    {
        for (int row = 0; row < _rows; row++)
        {
            for (int col = 0; col < _cols; col++)
            {
                Instantiate(_tile, new Vector3(row, col, 0),
                    Quaternion.identity, transform);
            }
        }
    }
}
Groundにアタッチしてパラメータをセット。

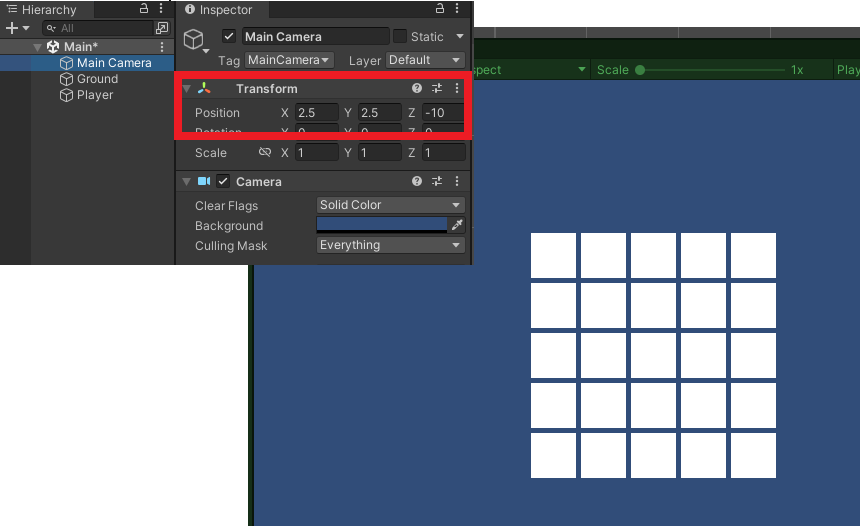
実行すると、原点(0,0)を開始位置としているので右上にマス目が寄ります。カメラの位置を変更して画面の真ん中にマス目が来るようにします。
プレイヤー作成
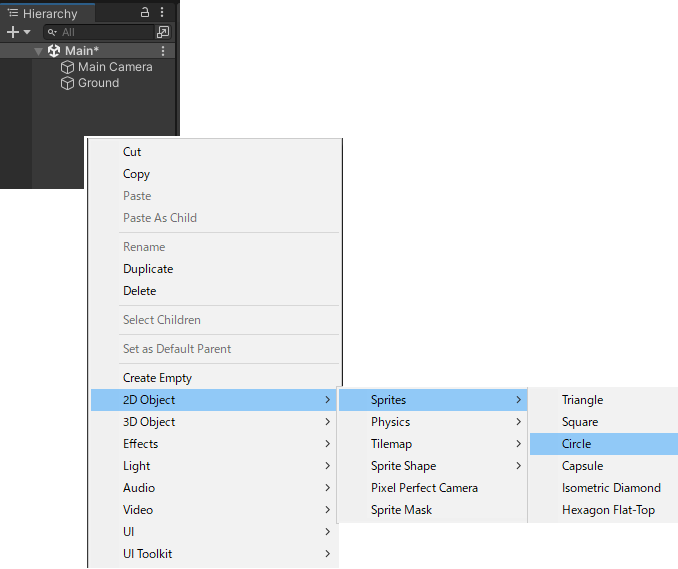
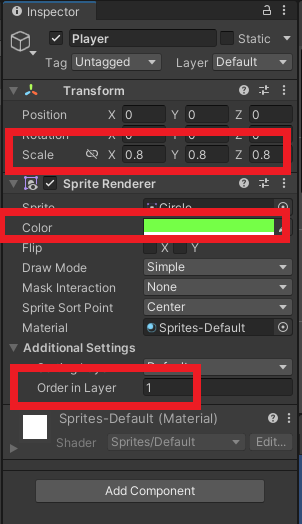
次にプレイヤー(動かすもの)をセットします。「2D Object」から「Sprites」の「Circle」を追加。
名前をPlayerに変更して、色を適当に変更しておきます。表示した時にマス目の裏に行く可能性があるため、「Order in Layer」も変更しておきます。
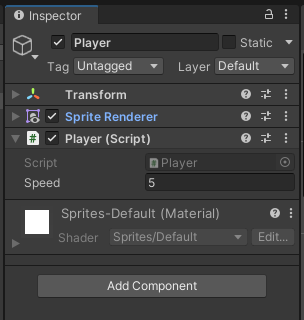
下記スクリプトを作成します。
using UnityEngine;

public class Player : MonoBehaviour
{
    [SerializeField] private float _speed = 5.0f;

    private float distance = 1.0f;
    private Vector2 move;
    private Vector3 targetPos;

    private void Start()
    {
        targetPos = transform.position;
    }

    void Update()
    {
        move.x = Input.GetAxisRaw("Horizontal");
        move.y = Input.GetAxisRaw("Vertical");
        if (move != Vector2.zero && transform.position == targetPos)
        {
            targetPos += new Vector3(move.x, move.y, 0) * distance;
        }
        Move(targetPos);
    }

    private void Move(Vector3 targetPosition)
    {
        transform.position = Vector3.MoveTowards(transform.position, targetPosition,
            _speed * Time.deltaTime);
    }
}
Playerにアタッチします。実行してみて矢印キーやWASDキーで1マスづつ動けば完成。
簡単に説明すると、distanceはマス目の距離、targetPosは移動先の位置をセット。Vector3.MoveTowardsは移動元、移動先、移動速度をセットすると、セットした移動速度で移動していきます。