UnityのCustomPropertyDrawerを利用してInspectorのGUIを変更してみます。
はじめに
Unityのバージョンは「2021.3.14f1」で作成しています。
PropertyDrawerを利用してInspectorの表示を変更してみます。
実装開始
まずは下記のスクリプトを作成します。
using UnityEngine;

public class InspectorTest : MonoBehaviour
{
      public int volume;
}
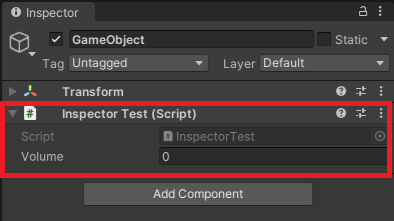
オブジェクトにスクリプトを追加すると、下記のようにInspectorに表示されます。
下記のように記載すると、Inspectorにヘッダーを追加することができます。
using UnityEngine;

public class InspectorTest : MonoBehaviour
{
    [Header("---Config---")]
    public int volume;
}

また、下記のようにすると、上限値、下限値をセットすることもできます。
using UnityEngine;

public class InspectorTest : MonoBehaviour
{
    [Header("---Config---")]
    [Range(0, 100)] public int volume;
}

これらはUnityが標準で用意しているものですが、自分で好きなようにInspector表示を作成することもできます。
CustomPropertyDrawerを利用する
スクリプトを下記に変更します。int型の変数二つをシリアル化したシンプルなものです。
using UnityEngine;

public class InspectorTest : MonoBehaviour
{
    public ConfigClass con;
}

[System.Serializable]
public class ConfigClass
{
    public int sfx;
    public int volume;
}
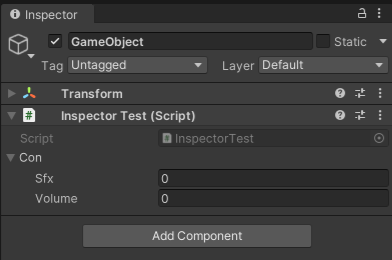
そのままだとInspectorには下記のように表示されます。
次に下記スクリプトを作成します。
using UnityEngine;
using UnityEditor;

[CustomPropertyDrawer(typeof(ConfigClass))]
public class Drawer : PropertyDrawer
{
    public override void OnGUI(Rect position, SerializedProperty property, GUIContent label)
    {
        EditorGUI.BeginProperty(position, label, property);

        position = EditorGUI.PrefixLabel(position, GUIUtility.GetControlID(FocusType.Passive), label);

        var indent = EditorGUI.indentLevel;
        EditorGUI.indentLevel = 0;

        EditorGUIUtility.labelWidth = 40;

        var sfxRect = new Rect(position.x, position.y, 80, position.height);
        var volumeRect = new Rect(position.x + 90, position.y, 80, position.height);

        EditorGUI.PropertyField(sfxRect, property.FindPropertyRelative("sfx"),new GUIContent("SFX"));
        EditorGUI.PropertyField(volumeRect, property.FindPropertyRelative("volume"), new GUIContent("VOL"));

        EditorGUI.indentLevel = indent;

        EditorGUI.EndProperty();
    }
}
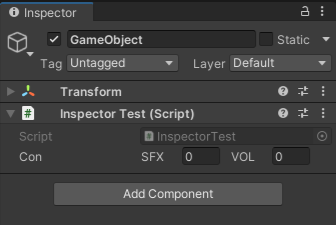
下記のように横並びで表示されるようになります。
長いスクリプトですが、実際に表示を変更しているのは下記の部分です。
EditorGUIUtility.labelWidth = 40;

var sfxRect = new Rect(position.x, position.y, 80, position.height);
var volumeRect = new Rect(position.x + 90, position.y, 80, position.height);

EditorGUI.PropertyField(sfxRect, property.FindPropertyRelative("sfx"),new GUIContent("SFX"));
EditorGUI.PropertyField(volumeRect, property.FindPropertyRelative("volume"), new GUIContent("VOL"));
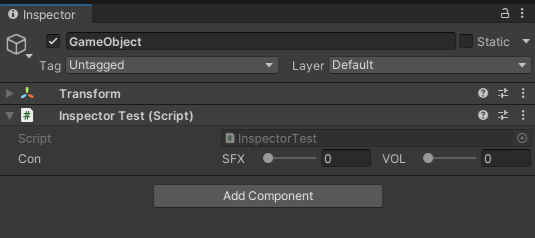
下記のように変更すると、スライダーを2つ並べることもできます。
var sfxRect = new Rect(position.x, position.y, 150, position.height);
var volumeRect = new Rect(position.x+160, position.y, 150, position.height);

EditorGUI.IntSlider(sfxRect, property.FindPropertyRelative("sfx"), 0, 100, new GUIContent("SFX"));
EditorGUI.IntSlider(volumeRect, property.FindPropertyRelative("volume"), 0, 100, new GUIContent("VOL"));
詳しくは下記の公式リファレンスにて。